Friday, March 24, 2017

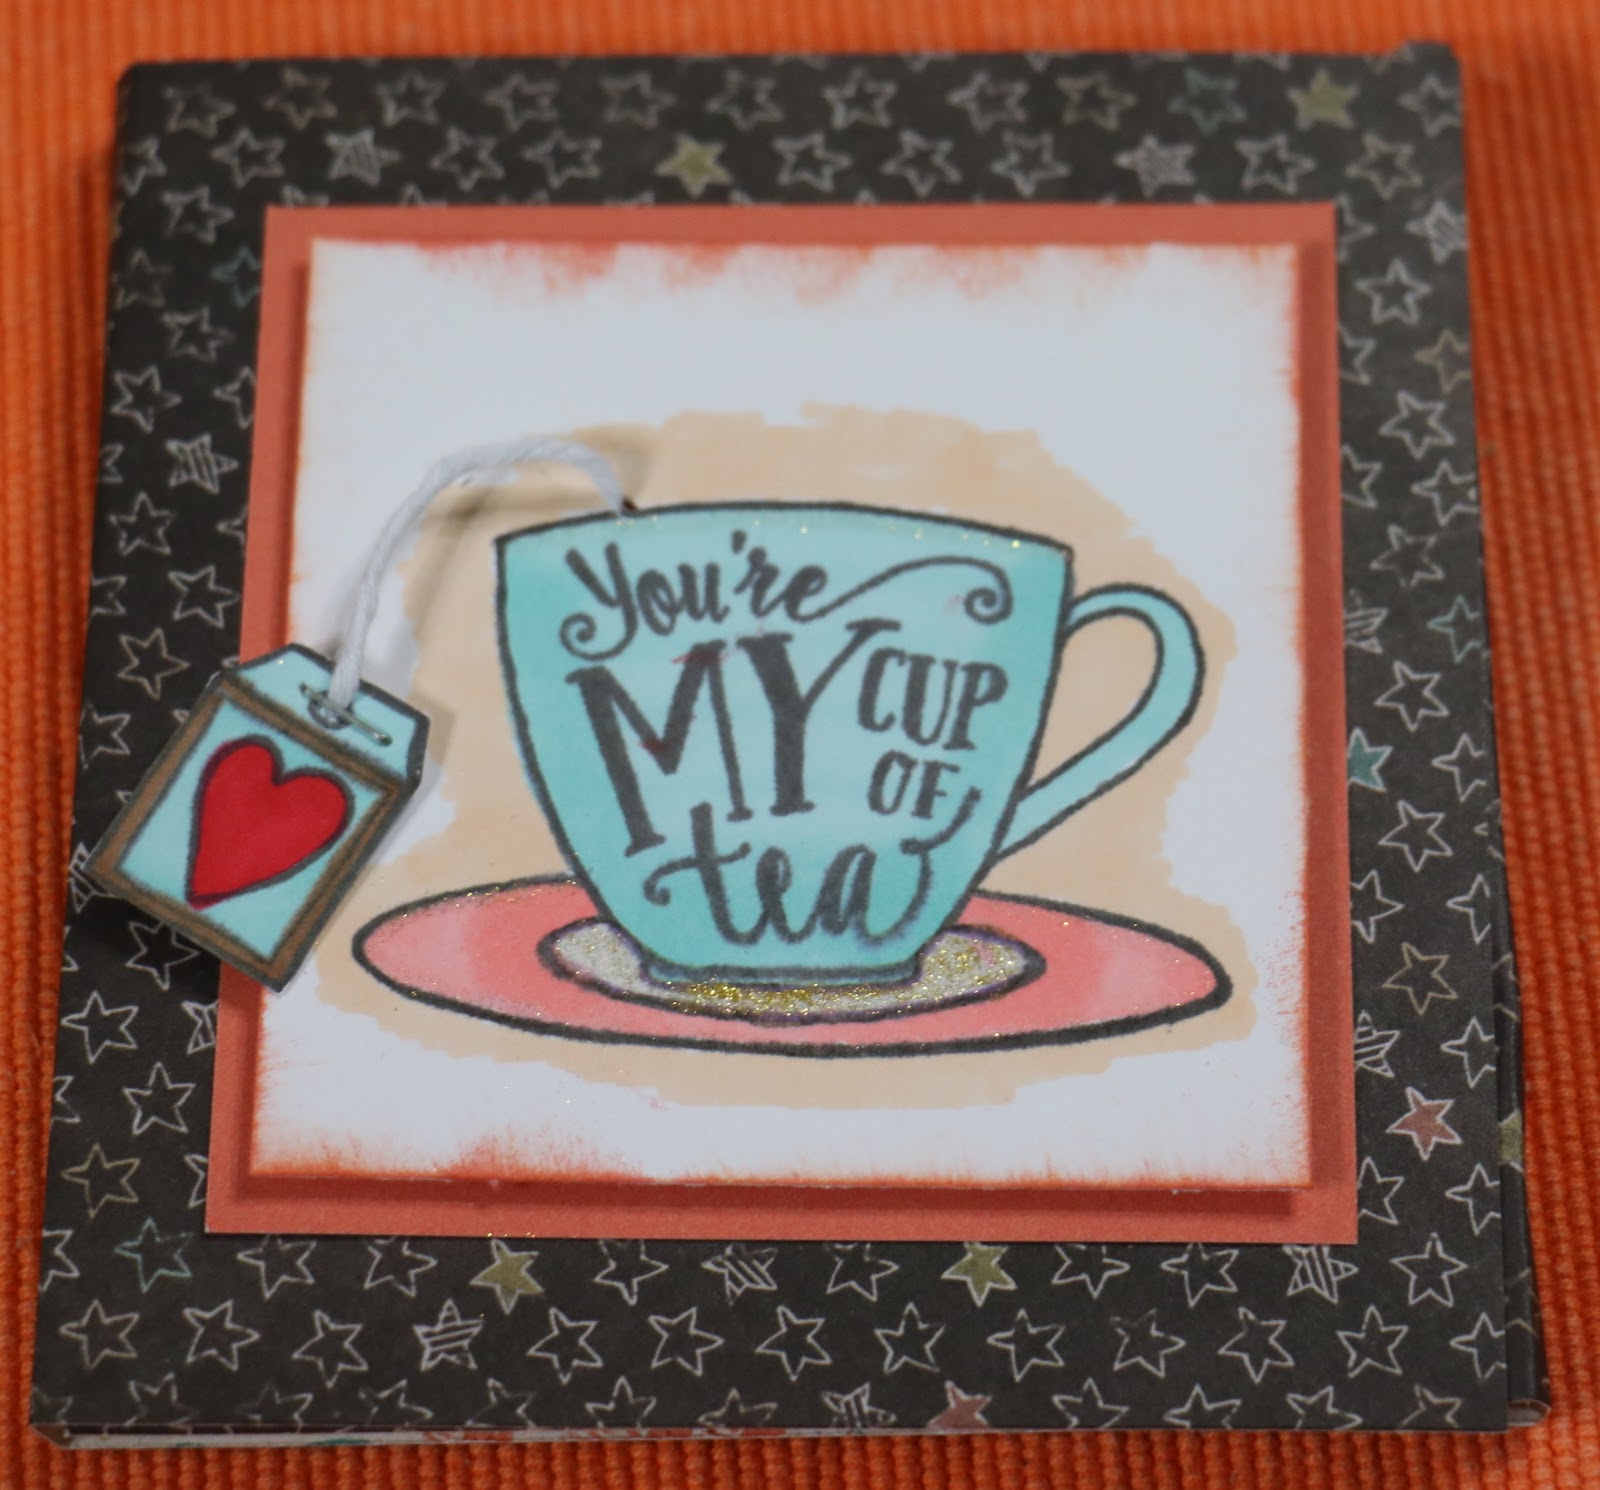
Tea time! Cute card using scrap papers with instructions

I love the March stamp of the month - so super cute!  I will use it next time I have Disney Tea Cup ride pictures.  But I wanted to do something now, so I put together this little card.  This is one of those things I am going to make a few more of and just keep on hand, to slide a tea bag in when I need it.  I can attach my business card to the back and hand them out, give them to a friend or co-worker that is not feeling well, or trying to give up coffee, or when I find a new flavor I want to share.  Tea is very trendy right now, so it's a nice way to share some of my favorite flavors and my love of crafting!


Cut a strip of paper 4" x 11 3/4"
Score at 3 3/4", 4", 7 3/4" and 8" (four score lines)
Angle the paper on your trimmer so the 8" score line is on the 1/4" line at the top, and on the 1" line at the bottom corner.  (I've drawn lines on this sample so you can see better.)  Then slice!


 Using thick narrow foam tape on the short edge and along the bottom, make a pocket for your tea bag.  Add a second little piece for the words - start with a 3" square, cut at 3/4" angled to the 2 3/4" level on the far side.  I find this easiest to mark those two measures, then slice the distance between.

Decorate the top as desired.  I used Shin-han markers to color my tea cup and make a shadow around the cup.  I poked a hole near the top of the tea cup, then pushed white twine through the hole with the paper piercer.  I did the same thing with the tag, holding both in place, in the back, with a little scotch tape.  I then added a staple to the tea bag - not only do real tea bags come with a staple, for some reason this kept my tag right side forward!  It is loose, and will move as you  move the card.  If  you tag doesn't want to stay right side forward, a little foam tape will help it out.  I added a golden touch with the new gold shimmer brush on the plate and the top of edge of the cup,


I was able to find the papers I needed in my scrap basket. I'm always looking for ways to make that pile smaller!


This stamp set is only available through the end of March.  $17.95 or $5 with a $50 order!


Wednesday, March 22, 2017

Spreading the Joy

I have been a Close to My Heart consultant for 5 years and I love it!  I love sharing my ideas, encouraging others, attending Corporate events, socializing and my discount - plus free items! 


Join our community of Consultants and start enjoying these rewards:
  • 22% base commission on product purchases and sales, with the potential to earn even more!  
  • Opportunity to make money doing what you love: crafting!
  • Flexibility to earn extra income while working your own hours.
  • New Consultant Kit full of product valued over $200!
  • $50 in Select Product Credit immediately upon sign-up.
  • Free Consultant website so your friends can shop with you online!
  • Opportunities for other exciting incentives, like trips, crafting products, and more!
For more information or to sign up - go HERE.  If you have questions this site can't answer or just want to talk, I'd love to hear from you.

Monday, March 20, 2017

Why Scrapbook?


I can only tell you why I do it, but it's for more than one reason.

Scrapbooks make great external hard drives. I have never had a great memory.  Little details from the past are always replaced in my brain with current events.  Scrapbooks help me dig up those older memories. They help my children see things in their past, from when they were too young to remember, and me to remember them when they were young. 

I have always scrapbooked, starting in my teenage years with a true scrapbook.  A bound book of papers in which I stuck all the little scraps of paper that meant something to me.   When I started travelling, I added pictures to those scraps of paper (ticket stubs, flyers, napkins).  When I am no longer able to go and do (at 90, 95 years old!), I want to look back and remember that I DID! 

I'm crafty.  I like to create, to make things.  I'm no expert creator, and sticking to paper keeps it cheap.  But I've always loved the paper side of it.  When I was about 7, I got a box of goodies for Christmas.  It was a big (for a 7 year old) cardboard box, filled with construction paper, glue, markers, a box of 64 crayons (with sharpener), pom-poms, magnets and pipe cleaners.  My mother has always thought it was one of the worst gifts they ever gave me as a kid; I've always considered it one of the best.

I think it's innate that we want to create or build something.  Quilts, cakes, gardens, paintings, jigsaw puzzles, whatever.  I love that my creating is something I want to keep and that has a purpose to me.  Others may look and the great ones actually admire my work, but ultimately, I scrap book for me. I scrap to tell myself the story of my life.

So. Why do you scrapbook?

Friday, March 17, 2017

Happy St. Patrick's Day!

Happy St. Patrick's Day!  For me, it's a day to wear green, and laughingly pick on people who don't (I stopped pinching years ago).  One day, I'll make it to Savannah and watch them turn the river green, if they still do that.
In a tribute to the wearing o' the green, I'm introducing my April Bells & Whistles workshop.  It's a soccer page, complete with grass stains!
The workshop will be held on Friday, April 28, from 7PM until 9PM at my house.  Cost is $10, and you do need to RSVP so I will have a kit ready for  you.  If you would like a kit, but cannot attend, please let me know.  I create all the kits at the same time.
Credit where credit is due - this idea is from a Pinterest pin, from allicreate.blogspot.com.
This layout has a horizontal 5X7, for a team photo, two 4x6's (one horizontal, one vertical) one 4x4, and places for five 2x2 photos.  What?  You say you only see 3 small wells?  This kit comes with a 2X2 flip flap to go over one of the wells that you can see.  Soccer is one of those times where you may have to be at a distance from the action, and your subject can end up kind of small in the scheme of the picture.  If you don't have good distance photos, these small squares can always be filled with words, or soccer embellishments from your own stash.

Thursday, March 16, 2017

Stock up Your Stash with a Party!


The fastest way to add free products to your private storeroom stash of scrapbooking supplies is to throw a party!  Hosting a gathering is easy - just find a place, invite your friends, and throw together a quick snack.  I take care of the rest.  You can even host the party at my house, or as a Face Book event.  If the event is in person, you can choose from one of four double layouts, which all guest will be able to complete while at your event, at no charge.  I offer a hostess gift, a door prize drawing and a small free gift for everyone who orders. 
How much you get free depends on the size of your gathering.
$150 party = $25 free
$250 party = $40 free, plus one item at half price (even the Cricut cartridges!)
$350 party = $60 free, plus one item at half price.
All it takes to quality for your free items is five to eight ordering guests, even if the orders are small.  The gathering is 1-2 hours, and when is totally up to you!  Contact me for more information or to set up your party, have fun and get free stuff!

Friday, March 10, 2017

Dreamin' Big kit


Back with more Dreamin' Big kit.  I love the colorful sequins in the kit.  They are smaller than our other sequins and come in green, rose gold, white and dark gray.  They are sticky backed and only $4!

This is another layout from the instructions in the kit.  It's basically just two borders at the top (one is zip strips) and one border at the bottom.  The instructions show you how to create two blocks of photos, one on either side of the layout.  It adds a few additional pieces of paper and PLM cards. My photos, for which the colors went well and the explore-dream-discover strip suited the theme of sightseeing, they didn't fit into the designated photo wells.  So I chunked that part of the instructions and went with what did work!  On the left, it's a 2X6 inch photo that serves as my title (as I completely forgot to do anything else for one!).  the next column is a 4X3 PLM card on top and a 4X4 photo on bottom.  Next column is a 4X6 on top and two 2X2's below that.  On the right side, those are 4X4 and 6X4's.  I flipped the flower paper to be bugs (cause I like the bugs!) and added some flowers from the compliment packs - much as the instructions call for.  If  you got 'em, use 'em!

Tuesday, March 7, 2017

Great deals on clearance items!

The special of the month of March is 25% of thin cuts, but Close to My Heart always has a sale going on.  You can find it in the clearance section of my online site.  Order on line and for $5 have it all shipped directly to your home!  Clearance items must be ordered online; they cannot be added to club or gathering orders.
I am placing an order through this site on Friday.  If you live close and would like to reduce the shipping from $5 to $1 (and come pick up from my house or day job), please send me your order by Thursday, March 9.  My tax rates will apply.
Clearance items are no items longer available in the regular catalogs.  But they come at great prices!  Here are a few samples:
Our Story PML cards - $3
4 embossing folders - $10.75

Ruby D Ring album - $17.50

Zoe Compliments - $1.75
Quantities are while supplies last!

Monday, March 6, 2017

March Stamp of the Month

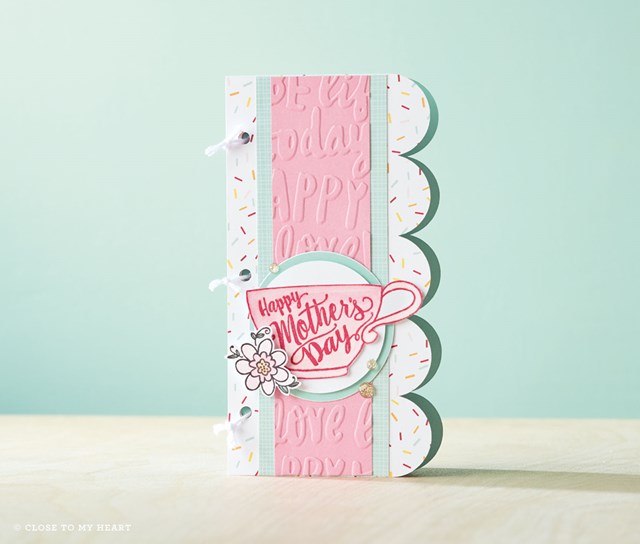
This is the March Stamp of the Month. It's only available during the month of March. It's $17.95 or $5 with a $50 purchase. 
Some samples of artwork with this cute set:


Friday, March 3, 2017

Dreamin' Big kit, Adventure is out there


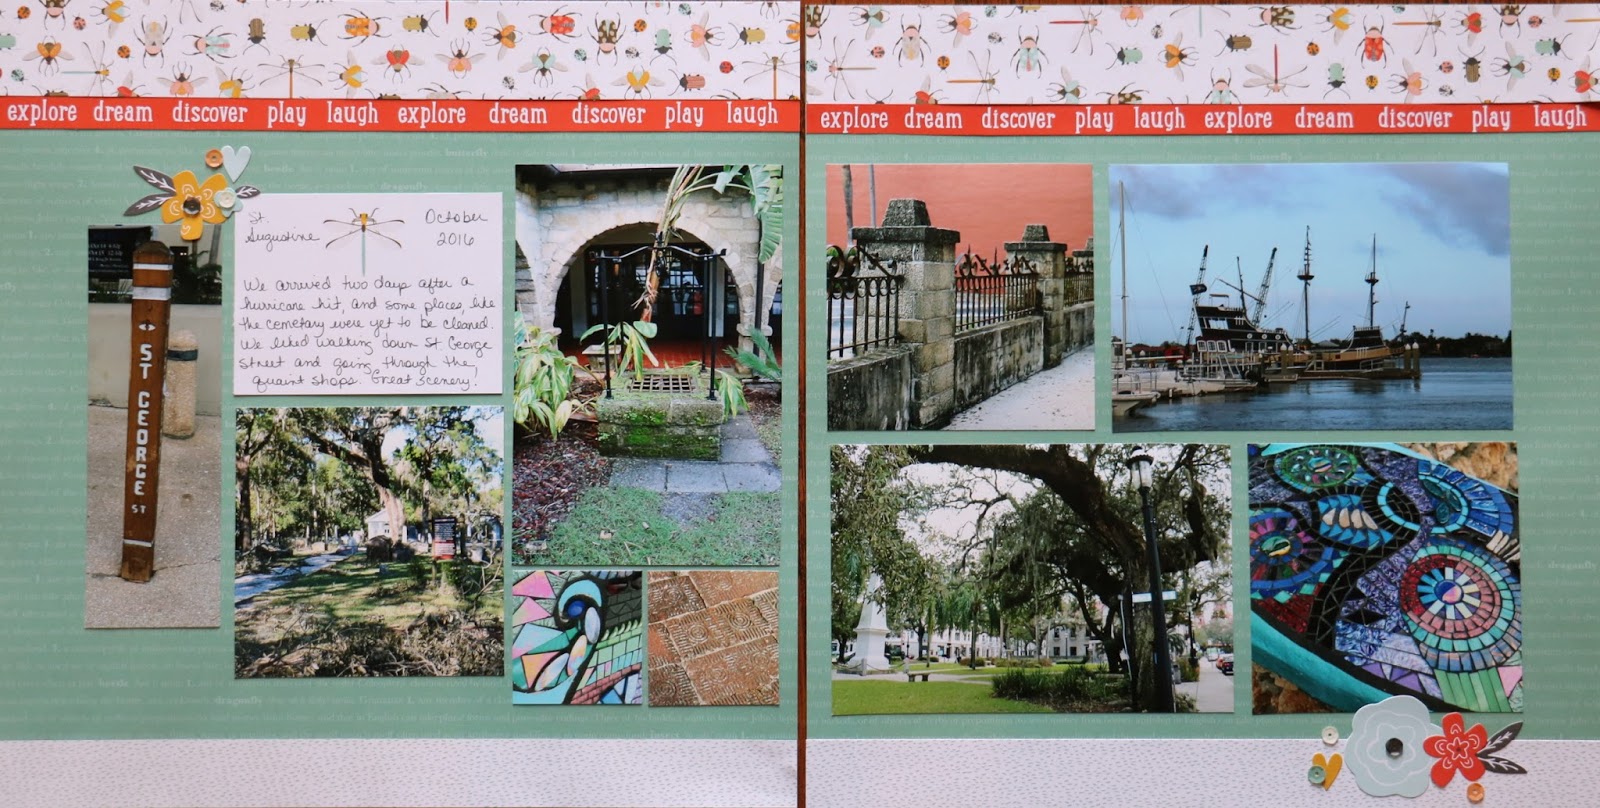
Here is another CTMH kit that seems to be flowers - AGAIN!  And for those of you who have girls or love flowers above all else, it's a great kit.  But I know many of you have those other things - BOYS!  The flip side of this flowered paper is BUGS!  I love it!  I have all girls, but I don't want flowers on every page.  If the layout called for the flower paper, I flipped it over and used the bugs.   I am thrilled with this new addition to our print options.This kit is called Dreamin' Big but when I dug into it, it was all about exploring.  Maybe the idea was to explore the outdoor world.  But I explore new places.  And this paper pack worked better than I expected for my travels.  There are no traditional travel details in this kit.  But the embellishment pack has this great set of stickers that reads Adventure is out there.  How fabulous is that?  I used it on a page of us sight seeing in St. Augustine.  Again - I was pleased with the way the colors went with my pictures.  This layout is from the instructions in the kit.  I did flip the horizontal border from the juniper side to the colorful polka dot side because it has some red in it, which went with the red pirate sash.

Wednesday, March 1, 2017

Cut it Out! - March's Special of the Month


Thin Cuts give you a fast and easy way to cut all kinds of shapes for your crafting, and


this month they are all available at 25%-off! Choose from titles, sentiments, and a wide

variety of shapes to stamp on, so you can get precise, dimensional shapes in no time! 

Bundles include the stamp set.


$32.95 Thin Cuts - now $24.71 in March
School Kids Bundle - CC1222

$31.95 Thin Cuts - now $23.96 in March
Swirly Shells Bundle - CC1219

$28.95 Thin Cuts - now $21.71  in March
Hello Lovely Bundle - Z3301

$23.95 Thin Cuts - now $17.96 in March
Sugar Rush Bundle - Z3300
Dreamin' Big Bundle - Z3303
Some Kind of Wonderful Bundle - Z3302

$18.95 Thin Cuts - now $14.21 in March
Swirly Shells - CC1155
Sweet Birthday Bundle - CC1220

$16.95 Thin Cuts - now $12.71 in March
Wreath Bundle - CC1221

$15.95 Thin Cuts - now $11.96 in March
School Kids - CC1158

$14.95 Thin Cuts - now $11.21 in March
Hearts -  Z3260
Stars - Z3261

$13.95 Thin Cuts - now $10.46 in March
Happy - Z3258
Celebrate - Z3256

$12.95 Thin Cuts - now $9.71 in March
Basic Hearts - Z3317
Basic Circles - 3318

$11.95 Thin Cuts - now $8.96 in March
Hello & Thanks - Z3259

$10.95 Thin Cuts - now $8.21 in March
Love - Z3257
XOXO - Z3305
Wreath - CC1157

$9.95 Thin Cuts - now $7.46 in March
Happy Birthday - Z3304
Sweet Birthday - CC1156


Tuesday, February 28, 2017

March Bells & Whistles, Head of the Class

As much as I try to schedule things far in advance so that everyone else can make plans, sometimes things come up to interfere.  My Bells and Whistles class is one of these.  The plan was for these classes to take place the last Friday evening of every month.  Well, February's got cancelled and I'm going to have to move March's to March 10th, 7pm-9pm.  I hope, that things calm down in the future, and I can go back to our regularly scheduled program.  Thank you for being patient in the meantime. 


Bells & Whistles class are by RSVP only.  If you don't tell me you are coming, I won't make up the kit.  Love the kit, but can't make the class?  RSVP and tell me you'll pick it up, and I'll stamp the set for you during class.  You can assemble it at  your convenience. 


March's Bells & Whistle Class if a school days page.  Ever have one of those certificate awards?  This is the page to display it!  It's designed to hold one certificate, one horizontal 4X6, one 3X3 and one wallet school photo.  The certificate area can be modified to hold a class photo instead.  Art work is another option.
I wanted to include some ribbons the school issued, and used the space for the 4X6 to display these.  There are lots of options in this layout to include memorabilia you want to preserve - just bring it with you when you come.


The Bells & Whistle workshop is $10.

Monday, February 27, 2017

Hello Lovely, the Rest of the Kit

Well, it's the end of the month, and time for the end of a kit.  It's a real shame when we look at our stash and just say "I have so much STUFF".  I don't think we could do without it; you need a certain supply level in order to have what you need, when you need it.  But I also know that I am not going to mix and match my wonderful CTMH kits.  So when I complete projects with all the leftover pieces of a kit, that's one less stack of supplies, and puts me closer to completed projects.  I have two D ring binders of completed pages, waiting on the perfect pictures to show up.  This process works for me, and when those pictures are printed, making it a completed work of art is a snap.


This is what I was left with of the Hello Lovely Workshop Your Way, after I finished the layouts and cards shown in the instruction set. It's not a lot, no full pages and lots of PML cards.


I am also a big advocate of using what you have.  We buy all these great stamps, then use them for the advertised sampled, but what then?  They shouldn't just sit in the box!  As a consultant, sometimes I worry that it's unfair of me to post a sample with a product you can no longer buy.  I hope that if you love something, you buy it and add it to your stock.  CTMH's marketing philosophy is to give you more options, and updates frequently.  You have 4 months to get what you like, then they give you new options.  If I use something retired, like this swan stamp, that you don't have, you can probably find another stamp set you love in your stash to pull out and use instead.

So back to what I did with the scraps from the Hello Lovely kit.  I loved the two tone Sorbet PML cards, but the colors just didn't go with my pages, in my color challenged mind.  But they made two of this great card.  The sentiment is from one of the stamp sets that come with the Flower Market Cricut cartridge.  Building from the bottom, that's a PML card, stamped the cattails, zip strip, swan, sentiment.  And when you have scraps of zip strips, you can add one to the bottom of the interior of the card for an extra touch.  The swans were stamped first and second generation in Sorbet.


Next is another PML card.  These said Best Day, in between the flowers.  I simply cut the Best Day out, trimmed the PML to fit my card and stamped a sentiment in the middle.  Then I took the clear shimmer brush and added sparkle to the flowers.


Next card - more PMLs!  This one took a little more time.  The green background is a PML card with more words I didn't want on there.  I matted it with Glacier paper, then covered the words with scrap strips and a leftover piece of zip strip  The flowers are from another PML card, where I fussy cut the bouquet.  There is a small strip of glitter paper in there, and again, I shined up the flowers with the clear shimmer pen.


Now cards aren't the only thing  you can get from scraps.  I usually start with laying all the stuff out on the table (like the first picture), then seeing what I can make pages with.  Anything I can't gets moved into a card.   I really liked the way this layout turned out.  You have to add cardstock when you do the pages, for this one it was two daisy white and one champagne.  This layout is simple - two zip strips across the top, a row of PML cards and scraps, another line of zip strips and a row of the blush shimmer ribbon.  Before placing all that down, I kept with the art deco style and stamped some loops on the bottom in Champagne (another retired and favorite stamp set).  The words are from the Hello Lovely scrapbooking stamp set, in Desert Sand.  The mats are in Champagne; one 5X7, two 4X6 and 3 3X3.  Oh, and a few of the new gold gems.  So, this makes layout number #4 from the kit.


And here is layout #5!  Just simple 2X2 squares along the top, a 1/4" strip of sea glass glitter paper below that, then space for 6 4X6 vertical photos across the DLO, then another strip of sea glass glitter paper.  The title will go at the bottom of the page, once the right pictures come along. The embellishments at the top are from a cricut cartridge - background in sea glass, top in white, then covered with clear Glitz. Yep, I still have some of that in my supply stash. You could also cut the top layer from white glitter paper for the same effect.


And that concludes this episode of Hello Lovely!  Tune in again, as we start Dreamin' Big!


Friday, February 24, 2017

March Card Class, Dreamin' Big

March card class is on Thursday the 9th, from 5:30pm until 7:30pm.  It doesn't take two hours to complete the cards, but the window is open that long for you to drop by when it best works for you.

We'll be making 3 cards, straight from the Dreamin' Big kit instructions.  Join me to get some hands on time with the Dreamin' Big stamp set and dies.  Cost is $3.  We'll be using the rock and roll method to stamp, but other than that, it's a simple class to create a few thinking of you cards.

Please RSVP if you are attending.


Thursday, February 9, 2017

Consultant Option


New Consultants who join Close To My Heart in February will get the February, March, and April Stamp of the Month sets for FREE! That’s an additional $53.85 in retail value added to the already incredible value of the New Consultant Kit!
For our former Close To My Heart Consultants, we will also offer a lower-priced, no-kit enrollment option that will allow former Consultants to sign up for just $50! They will still receive $50 in Select Product Credit to spend on products of their choice, meaning they basically get to sign up for free! PLUS they’ll get the February, March, and April Stamp of the Month sets for FREE!

Wednesday, February 8, 2017

Building a Tower

I am hearing a lot of positive feed back on the new ink pads.  The open easily and completely, with a magnetic closure, instead of the pop and twist.  While I did add a black to my collection, I will probably only build a complete set as the old colors retire and the new ones come in. They are priced at $8 each. I can say that so far, I am happy with the Workspace Wonder stamp pad stack ($10).  I only have the two, but they are very durable plastic and stack together nicely. In the catalog, it appears that the name is not on the side of the ink pad, but it is.


Monday, February 6, 2017

Chocolate!

What scrap day is complete with out a little chocolate!  For those of  you locals that don't already know, there is a Russell Stover's outlet in Athens.  This outlet has all the  traditional candies you can find in your local stores for about the same price, but it also has the seconds or bloopers that are much cheaper - 3lbs for the price of 1lb.  And some out of season candy, like these gems for just $.10 each.  I've lived in Madison for 5 years, and only went in for the first time in January.  Maybe that's a good thing considering how much of it I've eaten since then!


Friday, February 3, 2017

Scrubbing It Clean

I love our new scrubber.  I guess it's not really new anymore, it's been around for 2 or 3 years I think.  The scrubber is $13 and the Spritz cleaner is $5 (big bottle refill - $11.50)


A couple of handy tips:
  • Rinse your scrubber out occasionally.  The ink does transfer from the stamps to the scrubber, but it will stay with the scrubber until it's cleaned.  Just occasionally works, depending on your use level.  I do it about once a month.
  • After cleaning your stamps, stamp the cleaned stamp on a piece of paper.  This will  help remove any cleaner.  When you let the cleaner dry on the stamp, it can affect how well the stamp picks up ink next time you go to use it.
For a long time, I cleaned my stamps with wet wipes.  That works great, until your wet wipe dries out a bit and you get a fuzzy layer on your stamp.  This scrubber gets rid of that fuzz layer lickety split.

Wednesday, February 1, 2017

Background Cuts Please and Make it Super Sized!

 
Today I have a few tips about Cricut mats.

  • I buy the 12X24 mats, when they are on sale, and cut them in half.  24" is way longer than I need, but the price is much cheaper to make your own 12X12's from the 12X24 size.
  • When using the cut in half mat, sometimes you need to flip the mat around, to use the less used, more sticky side.  Remember to drop your paper down one inch when rotating your cut mat.  The machine needs that first inch just to hold the mat.  Don't worry about the paper not sticking to that final inch of the mat.  I haven't ever found this to be an issue.
  • The CTMH Cricut cartridges have some great full page backgrounds for your 12X12 layouts.  Many times, it won't cut a shape larger than 10 3/4" or 11", and you might want to cover a bit more of your 12" layout.  Try telling the Cricut that you have a 12X24" mat.  It will still only allow you to get 12" wide, but usually I can get the cut a bit bigger with this minor fudge.  It will cut off the page just a bit, but that might be okay, depending on your purpose.

These are cuts I did from the Art Philosophy cartridge as the page kit for the Fundamentals retreat (in 9 days!).  Telling the machine I was using a 12X12 would only allow a 10 3/4" shape. Telling the machine it was 12X24 and I got 11 1/4 " shape.  It helped fill my page top to bottom.  Left to right, I already wanted the off the page effect, and actually cut a little more off the side than the machine did.


Monday, January 30, 2017

Quick and Easy Layout


CTMH has had quick and easy precut cards for a while now.  In the latest catalog, they have introduced  Cut Above scrapbooking layouts for $15.  This kit includes all the stuff you need to create this layout.  I loved the B&T paper for they have for the background and that is why I got this kit.  Anyone can do this kit; it was designed for the beginning or even non-scrapper.  You don't cut the papers, you punch them out, tape them down and add stickers.  And you still end up with this super cute page.  My baby is 19, but I didn't start scrapping until she was 6.  I have pulled pictures from the old photo albums and scrap them when the right layout comes along.


The kit comes with two page protectors for this double layout - as well as two divided pocket page protectors and 12 4x6 Picture My Life pocket cards. This is another super simple and fast way to get your photos where you can enjoy them - with journaling!
 

Friday, January 27, 2017

Hello Lovely kit, Casa de Suenos

I used the last kit layout from the Hello Lovely kit to showcase the lovely bed and breakfast we stayed at in St. Augustine, Casa de Suenos.  I always take pictures of the room, including the bathroom and the room number, in this case, the room name.  I love the little plastic sticky embellishments that came with this kit - here your can see the hearts.  They are a matt gold color and quite thin so there is no bulk on the pages.


If you follow the instructions and do all the kit pages and cards, you don't have a lot of extras to work with.  I love this, as I have a huge stash of papers.  I feel good when I use up a kit.  If you like to stretch your papers, you can use cardstock as your bases instead of the B&T papers, as two of the layouts suggest.  Consider adding the coordinating cardstock pack if  you like this option.

Wednesday, January 25, 2017

Hello Lovely Kit, PineWood Estate layout


The Hello Lovely kit has a art deco style to many of the paper designs.  I really like the designs, as some of them are more artistic than simple patterns of dots and lines.
I used another of the kit pattern layouts for pictures of the Pinewood Estate.  This building is located on the Bok Tower Garden grounds.  Mike and I decided we could retire in a place that size in sunny Florida, so even though we didn't tour the inside, the Estate made it into my scrapbook.


Monday, January 23, 2017

Hello Lovely Kit, Bok Towers Layout

 
This month I've been working with the Hello Lovely kit.  When looking through the catalog, this is the paper pack to go with your wedding photos.  Lots of pinks and greens and flowers.
 

I do not have wedding photos to scrap.   I have travel photos that need scrapping.  So how did I use this kit to that end?
 
We (I) like to tour gardens when we go places, as well as the Huntsville Botanical Gardens locally.  In October we visited the Bok Tower Gardens, a lovely place in South Wales, Florida.  The towers themselves are actually from pink and green stone.  It always amazes me how the colors of the CTMH packs manage to go with my pictures. 


This layout is one from the kit.  I adjusted the pictures sizes a little to accommodate my brochures.  The kit instructions include this layout plus two others.  There are no stamping instructions in these kits for the layouts - just quick and easy paper cutting and embellishments. 

Saturday, January 7, 2017

January Card Class

January Card Class is Thursday, January 12, 5:30-7:30pm.  3 cards, $3.  Please RSVP if you are attending!  In this class we are using Hello Lovely papers, Hello Lovely - Scrapbooking stamp set, and a retired sympathy stamp set.  If you are in need of sympathy sentiments, Heartfelt Thoughts is available (C1661, $13.95).


Wednesday, January 4, 2017

Free National Papercrafting Month Paper Wreath


Every January, CTMH celebrates National Papercrafting Month as a way of acknowledging the pure joy of playing with paper! We scrapbook with it, we make cards with it, we decorate with it—in short, we craft with it! This January, we’ll be celebrating the joys of paper-crafted home décor with the beautiful Welcome Home wreath kit. This kit comes with pre-cut pieces you can simply pop out, shape and attach to the sturdy chipboard wreath base, making a welcoming décor piece for your home.
How can you get it?
Purchase the Welcome Home wreath kit outright for $18.95 with no qualifying purchase, OR earn it FREE with a qualifying $60 purchase!