Sunday, March 31, 2013

Happy Easter!

I hope you had a wonderful weekend and Easter!  It's been rainy here, the perfect weather for scrapping.   I made this colorful recipe card I wanted to share with you.  It's a different look, but all Close to My Heart products. I took advantage of our blooming porch peach tree as a nice prop.


The background is from smearing ink on a Craft Sheet, then spritzing it with water (Z1380) til it beads.  Place the 6X6 paper on the ink, let it absorb and then pick it up and let it dry.  I used twilight, buttercup and bard red here.  The dragonfly (A1134) is in black ink, and the post mark (Jardin D1528) is in grey flannel.  I folded the black tulle ribbon (Z1798) and adhered with liquid glass (Z679), letting two ink pads hold down either side while it dried.  I've also added a piece of the black flourishes (Z1745) and some embellishments from the slate pack (Z1787).  Using the foam tool (Z1298), I added some light color (twilight, buttercup and blush) to the white recipe part, to keep the color flowing and decrease the stark contrast of the white paper. This did smear my printer ink a little, but not enough to bother me. Add some black hemp (Z282) to finish off the look,

Friday, March 29, 2013

Herd it's your birthday

The new Distressed Backgrounds (D1544) stamp had me pulling out a retired set.  The chicken wire went great with the barnyard characters in the Howdy Stamp Set (D1435, retired).


The dots on the page are just pen marks from the sweet leaf markers.

Everything but the kitchen sink

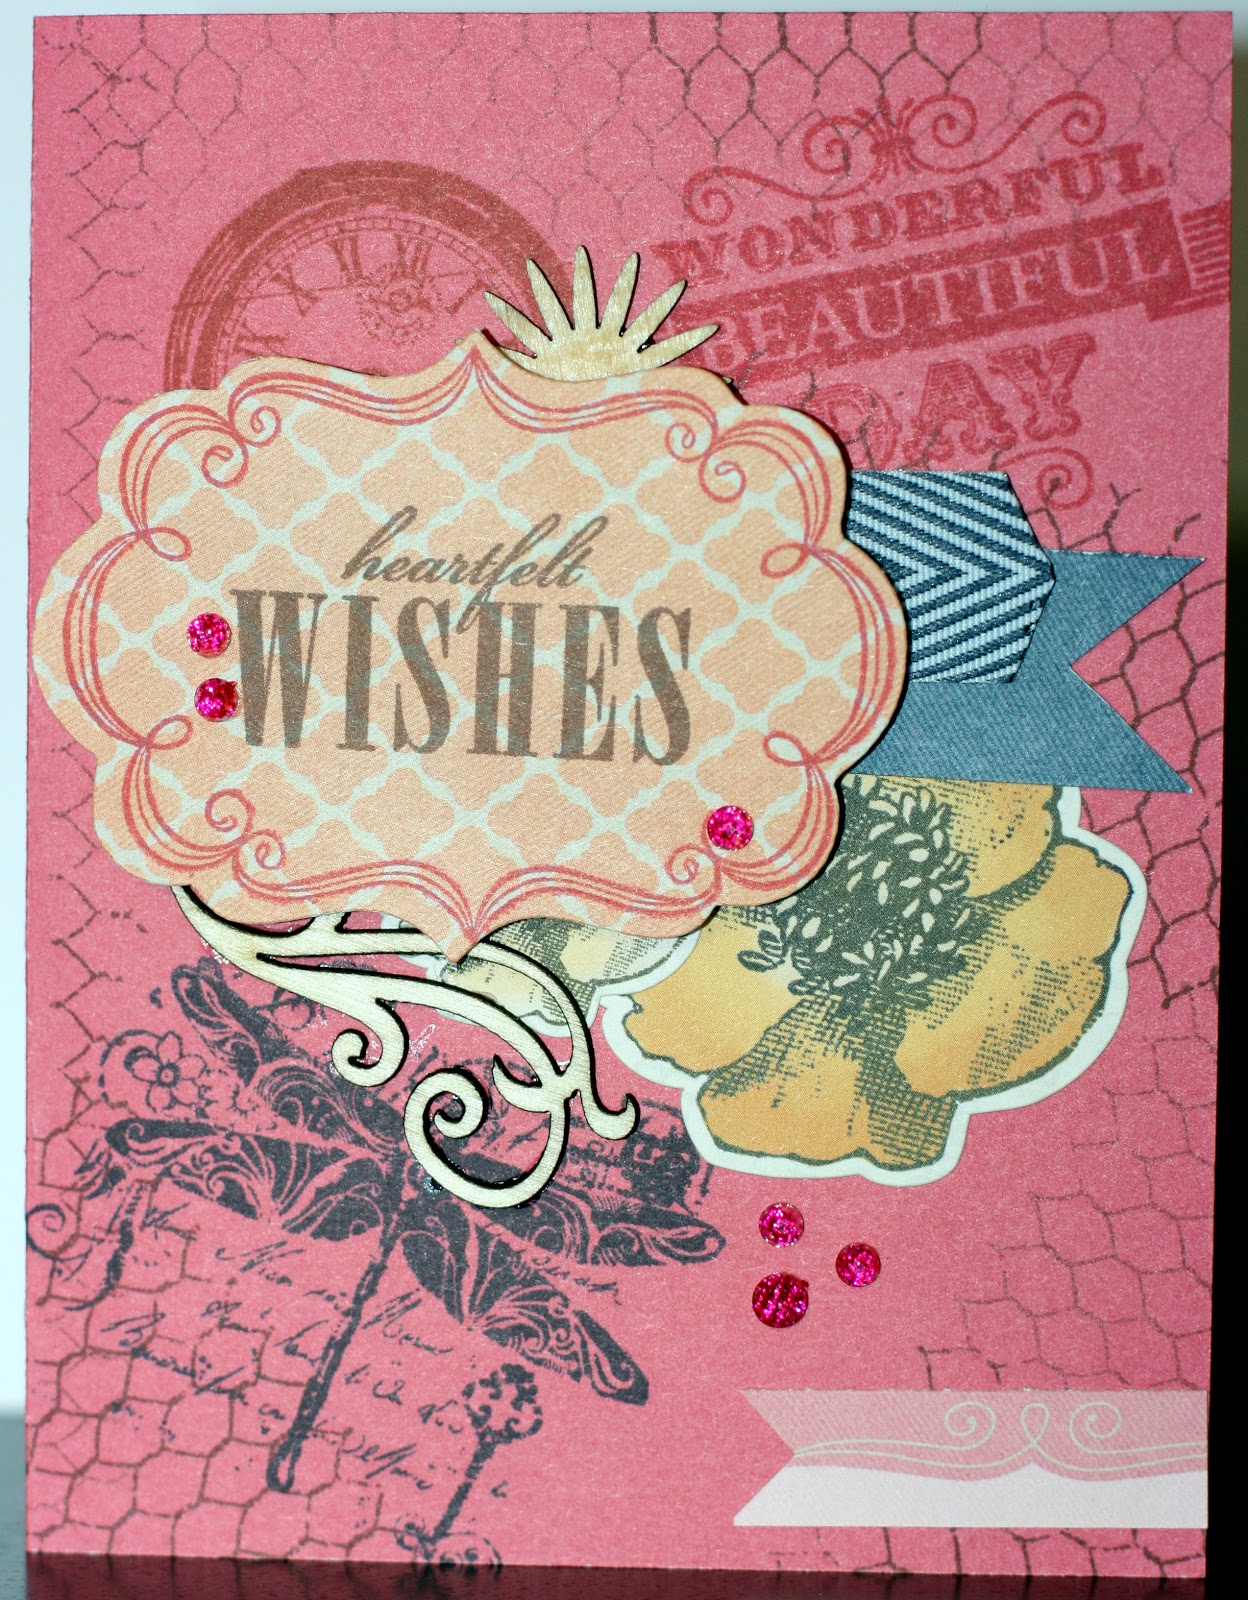
I lucked up on this entry - it's a piece I've been working on this week and it just happens to be the colors of the Close to My Heart Color Dare for the week.  I was going for a particular look and used all these items:
Claire Paper Pack X7166B
Outdoor Denim Chevron Ribbon Z1808
Pink Glitter Gems Z1807
Buzz & Bumble Stickease X7164C
Quick Cards Dragonfly A1134
Garden Wooden Shapes Z1718
Wooden Mini Medly Accents Z1837
Frame Flair  D1546
Buzz & Bumble Kit stamp G1054
Distressed Backgrounds D1544
Card Chatter - Sympathy D1476
Enjoy Life C1439 (retired)


To make this card

 
If you got it - use it!
 
Try your own card and post on the Color Dare site - this week is a prize week!


Monday, March 25, 2013

Pretty Pastels

Entering the Color Dare again - it was hard not to throw some sweet leaf in  here to get a good rainbow!  A little VersaMark, a little black embossing powder, then the foam tool to add some blush and buttercup.  I'm still not an expert with the black powder, but I  hear practice makes perfect.

 
Here are my first couple of trys.
 

Wednesday, March 20, 2013

April Crop on the 20th

The weather is warming up and creating lots of good photo ops! The April Crop will be on the 20th, from 9am until 9pm or anytime in between.  No charge with a minimum $10 order or $5 with your own supplies.  You will have access to all my stamps, ink, Cricut, and cartridges.  It's best to remember your own cutter.  Lunch, drinks and snacks are provided.

This month's featured kit is Tommy - red, yellow and blue nautical themed paper.  Think Navy, beach, boating, lake, observatories, summertime and pirates.  A good scrapbook title could use Navigating and link this to a non-water related activity - such as Navigating the First Day of School or Naviagting from the Backseat (road trip).  Use Weathering the Storm for pictues of heavy snow days, damaged property (yes, we were hit by a tornado several years ago), or remembering crying babies.  Or the teenage years.....

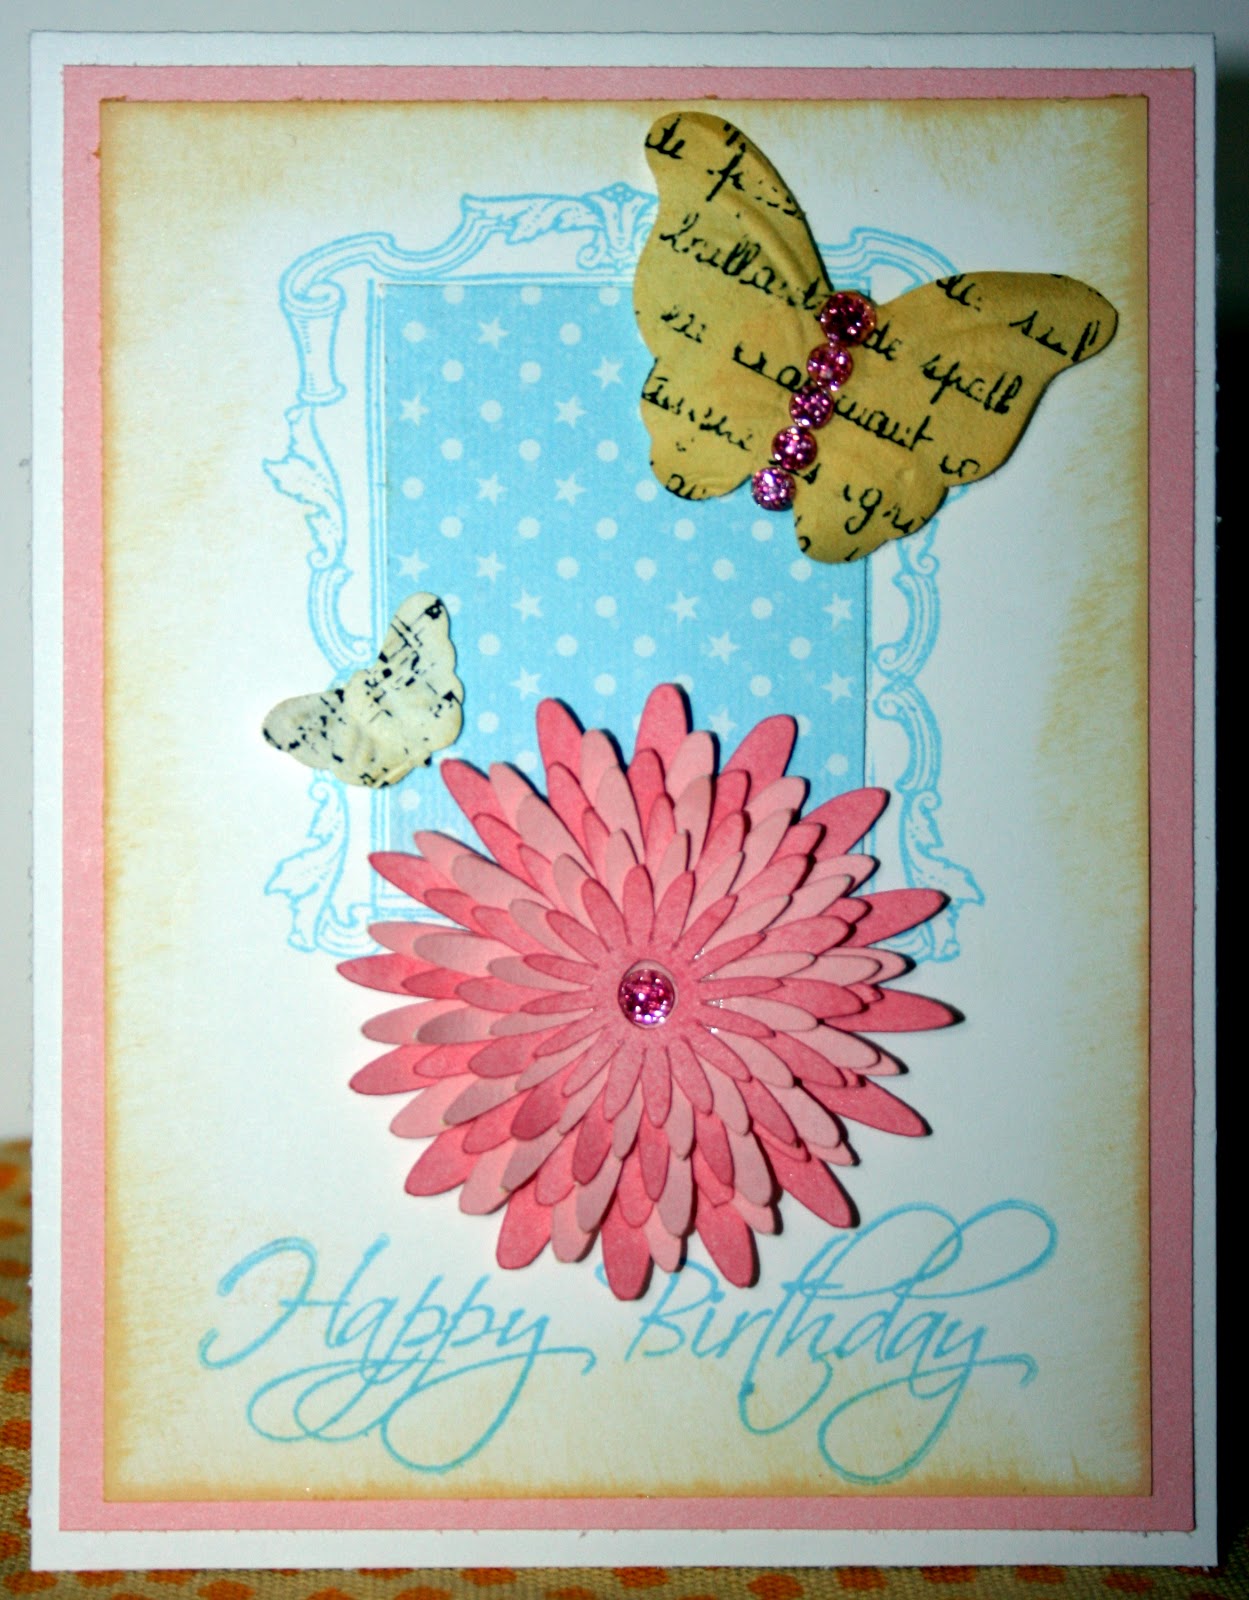
Graduation or Birthday Card
Anniversary Card
 
The April Stamp of the Month can be added to any $50 order for only $5. See page 141 of the catalog for more details.  I think this set is really cute and 5 of the 6 stamps have co-ordinating shapes on the Artiste cartridge.
And as an added incentive, I'm giving away this petite perks stamp set with any order.  April orders need to be in by April 9th in order for our supplies to arrive in time for the crop.

Sunday, March 10, 2013

March Workshop

The March workshop will be from 5:30pm until 7:30pm on Thursday, March 21st.  For the workshop fee of $3, you'll make a little peeps treat box and a colorful Easter card.  The pieces are precut to save time, so please RSVP by March 20th. These projects use the Artiste and Art Philosophy cartridges, stamp set Easter Wishes B1422, as well as the retired August 2012 SOTM (but any good swirl would do). We'll be doing puddle stamping for the mulitcolored effect.  Look forward to seeing you!


Sunday, March 3, 2013

Hugged

Most of my cards get sent in the summer, to my daughter when she's off at camp.  This one uses the colors from the Color My Heart dare.  The bigger card lets me write more, as she says my letters are always too short.  I love the sentiment as well.


Happy Camper stamp set C1457 (retired)
February 2012 SOTM
Pear Ink Z2197
Lagoon Ink Z2195
Outdoor Denium Ink Z2140
Colonial White Die-Cut & Envelopes Z1738
Claire paper pack X7166B
Hooligans paper pack (winter 2010) 
Blending Pen 3174


Thursday, February 28, 2013

Recipe Card Swap

In March, the group in Cairo and the group in Huntsville will be working together to create a mini cookbook, with paper crafted recipe cards.  If you are particpating in this project, I have a few tips.
The base cards are 6" X 6".
Use cardstock as the base paper, for a longer lasting recipe book.
Don't punch holes, you will do that to all your own cards so they line up right.
If you are going to complete your cards at the crop, preprint and bring your recipe,
on your final paper.
 
My first try:
 
Front
 
 
Back


Tuesday, February 26, 2013

Chantilly Crop

Oh my gosh!  I just thought the Buzz and Bumble kit was going to be my favorite but the colors in this Chantilly kit just make me happy!  The layout is super simple.  For the mom's with a family a boys, consider switching the cotton candy pink out for some twilight blue and using these pages for Easter pictures. The multicolored print is a simple green print on the opposite side, if its still to much pink for your taste (but it's so pretty!)


It's late and work beckons in the morning but I couldn't resist doing half of the layout to share.  The Chantilly Crop will be on March 9th, 9am until 9pm.  Please place your order no later than March 1st in order to have you supplies here on time.
Also,  Ink Club orders are due this month.  Suggested co-ordinating inks are cotton candy, pear, twilight and buttercup.

Monday, February 25, 2013

Later Sk8r

Another successful crop this weekend, thanks guys!  I made one card and 4 double page spreads and used up all my Later Sk8r paper!


Something cool about this page - I used the leftover paper instead of the letters for part of my title.  I stamped some gray paper with the circle stamp from the kit, using lagoon ink, then cut the letters out.  I used some of the extra (after cutting out the title) to mat the picture on the left page (bottom picture).  Only the top part of the paper was stamped, but the effect was very cool.

Dream Big stamp set
Later Sk8r stamp set
Typeset stamp set (2011, retired)
Milepost shapes
Later Sk8r paper
Black & Grey Sparkles assortment


Tuesday, February 19, 2013

Egg-cited!

I received a nice big package today, complete with new paper, stamps, inks and embellishments.  I started with this little Easter card.  Crop from 9am - 9pm this Saturday (Feb 23)!

 
White Daisy Die cut card Z1473
Easter Wishes Stamp Set B1422
Claire Paper pack X7166B
Blending Pen 3174
Sunset Ink
Hollyhock Ink
Grass - Artiste Cartridge, page 73 - 1"
Eggs - Art Philosophy Cartridge, page 57 - 1 3/4"


Sunday, February 17, 2013

Sweet inspiration

Another Bee Card.  I'm eagerly awaiting the arrival of the new papers, and inspiration has eluded me recently.

Thursday, February 7, 2013

No Naked Nuggets

Thursday night was a blast making candy treat bags and eating chocolate covered strawberries.

Wrapping the candy is so easy and uses such small scraps, we decided no more naked nuggets!

The next all day crop is February 23rd. The order deadline is February 13th, with the featured kit of the day being Later Sk8r.

Tuesday, January 22, 2013

Rainbows and Sunshine

Well, I couldn't resist trying out my own suggestion from yesterday.  And don't you know I love rainbows and glitter!


Every once in a while I do a page of random photos I've collected. If you are catching up with older photos, you can adjust the size of the sunshines. I started by trying out different sizes on a spare white page - the kind that comes in the photo albums but is really too thin to use.  It's great for making sample templates.


They kind of look like gears here!


Then I laid the templates on top of my photos to see which size I wanted to use; 5.5" worked best for mine. Use the center piece from your cutout to mark the back of your photo, then trim a bit wider than the circle.  It doesn't have to be super straight because the edges are hidden behind the sun. 

I used a variety of colored paper from a variety of CTMH kits. To keep it rainbow-y, I went with ROY G BIV on the color layout.  Again, I've cropped a photo for a cohesive look between the pages. That's white daisy ink (paint) in the corners, with the August 2012 SOTM. 

**When using daisy or colonial, keep in mind its a thick pigmented ink, and acts like paint.  You want to dab your stamp til it's covered, not press hard on the ink pad.  It's thick and you can loose some of your smaller details, so test your stamp choices before you ink your final product. 

The cloud is also from the Artiste cartridge, page 70.  This one is 5.5inches and I used it for my journaling space too.  I used the large Chocolate alphabet for the title and a Milepost shape '&' sign, covered in red glitter glue with a few more glitter colors thrown in.  A little (okay maybe a lot) of stickles around the edges of the cloud and some pink, green and blue gems on the corner details to finish out my colorful theme.

Monday, January 21, 2013

Bee Happy!


Time for a card today. I used the template challenge from the Mojo Monday blogsite.  The sunshine is from the Artiste cartridge, page 70.  This one is 2 inches and I used some embossed foil in the background.  When doing scrapbook pages, consider making the sun bigger and using it to frame a picture.


Sunday, January 20, 2013

Fun! Cool! Original!

Sometimes it's the little things you want to look back and remember, like buttermilk batter fried chicken and some silly faces.  I did my journaling by hand along the bottom border (but purposefully left it out of this photo).  To keep the photos the size I wanted, I dropped a couple of them to the edge of the page, outside the borders. It's kind of like coloring outside of the lines!


Clementine paper, large and small Chocolate alphabets for 'Camp Grandma', the November 2012 SOTM for the dates and the April 2012 SOTM for Fun!Cool! and Original! Be sure to check out the February 2013 SOTM if you like to scrap family daily life photos or make housewarming cards.

Card Workshop this Thursday, 5:30 - 7:30!

Thursday, January 17, 2013

Fishing Fun


The Close to My Heart Heart 2 Heart challenges are a great place to go when you are looking for a starter page that holds a nice amount of photos.  This is from an older challenge and I used older paper. The title is using the Trinity Alphabet stamp set - both sizes from the same set!  Don't be afraid to cut your pictures and let them cross the pages, when you can avoid cutting a person down the middle.  It will give you more versatility.


Sunday, January 13, 2013

Dressed up Nuggets

Create a treat for your Valentine on the February (7th) Workshop.  If Valentine's Day isn't your thing, stop by anyway (5:30 -7:30) and create a simple birthday treat or a thank you.  Cost is $1.00 per treat, make as many as you like. 

These are Hersey's nuggets, wrapped in pretty paper and stamped.  The Artiste Cartridge was used to cut the toppers.   Don't forget, the birthday gift card card workshop is on January 24, 5:30 - 7:30pm, $3.00.  (See previous blog for samples.) 

Sunday, January 6, 2013

Climbing roses

It's almost time for the new stuff, so I'm trying to finish up some of my older kits.  This is using the Florentine paper kit from the Spring/Summer 2012 catalog, and on it's way out with the new Spring/Summer 2013 catalog.


The circle on the right side is a Timeless Charm (available through January), with a metal frame in the bottom left  (try Pewter embellishment Z1487 for something similar), that will eventually hold the date.  The branches are cut on the Cricut with Stretch your Imagination cartridge, and the little flowers are from the dollar shelf at Once Upon a Scrapbook.  I like leaving lots of space in the middle when I don't have the perfect pictures yet, but spending a little time on the details always makes for a nice page when it's finished.

Friday, January 4, 2013

January All Day Crop

Still working on pictures from our trip to Port St. Joe. This is using the Stella Kit.


The January crop on Saturday the 12th will feature the Avonlea kit (see previous post).  9am - 9pm or anytime in between.  Free with a $10 purchase, or $5 if you bring our own supplies.  Lunch (chicken salad), snacks and drinks are provided.  Scrapping inevitable, socializing encouraged.

Wednesday, December 26, 2012

Ink Club

The Ink Club will debut in January.  Purchase at least $25 worth of products every other month (Jan-Mar-May-Jul-Sep-Nov) and with each purchase receive a free ink pad, your choice of color.  It's a great way to build your color collection.  During these months, purchases for your crops count toward your Ink Club minimum.  To join, just place your order for $25 by January 3rd.

This stamp was inked using re-inkers on a puddle pad.  You can achieve much the same effect with the rock and roll method.
Paper - Stella
Stamp - Quick Cards - Bountiful Season
Burlap Ribbon
Durable Studs - Square
Artiste cartridge

Wednesday, December 19, 2012

Heart 2 Heart Challenge


I like the Heart 2 Heart scrap booking challenge because it uses a lot of pictures.  It's designed to hold a panoramic picture crossing both pages (at the bottom).  As I have never gotten into taken panorama's, I used 3 landscape photos instead.


I loved the wood plank pages from the Dakota set and added some of the Florentine kit to drop in some more color.  An extra picture turned into my title, the font from the Artiste cartridge.

Wednesday, December 12, 2012

More Gift Tags

I couldn't wait until after Christmas to recycle this card.  Charlotte didn't know what a great Christmas card she was sending us, but I thank her greatly.  Besides wishing us Merry Christmas, her card brought me fun and four new gift tags for next year!

First, I cut two tags from the back of the card, then used the outside piece to line up the card so it would cut where the best pictures were.  Then I just applied the card to a Cricut mat, cut two 3" tags, moved the card and cut two more.  A little bakers twine and presto - really cute gift tags!  Save your Christmas cards and bring them to the crop on January 12th to create your own.

Monday, December 10, 2012

Avonlea Crop

The crop on Saturday, January 12 will be from 9am until 9pm or anytime in between.  Cost for the crop is $5 if you work with your current supplies, or free if you purchase a paper pack ($10).  Lunch, snacks and drinks are provided.  We are featuring the Avonlea pack in January. The following spreads also use some of the Parlor velvet rub-ons ($5), Mocha opaquest adhesive gems ($3) and/or the Avonlea complements canvas shapes ($6).  The colors are teals and greens, if you have printed photos that would co-ordinate. In order for the supplies to be here in time for the crop, please RSVP with your order by January 3rd.


I modified the instruction page to use 4X6 pictures instead of 3X3's.

Parlor velvet rub-on close up.  A bit tricky to work with but very nice detail.

Saturday, December 8, 2012

First post


I'm starting this blog to share my ideas, and give you a little more information about the crops and workshops I'll be holding.  The next workshop is Thursday, January 24, from 5:30 to 7:30.  At this workshop you will create three birthday gift card cards - cards that have a built in pocket for a gift card.  Cost of the workshop is $3.  Papers are precut and assembly will take about 45 minutes.  The projects use the Artiste Cricut cartridge from Close to My Heart, as well as the stamp sets that come in the collection.