Friday, January 8, 2016
Dancing Feet
Wednesday, January 6, 2016
Race to the finish line
Grab those beach pictures you haven't finished scrapping yet and let's get going with the new Regatta papers from Close to My Heart.
Close to My Heart has revamped their Workshops on the Go - moving to a new format and called Workshops Your Way. These new kits are priced at $27 and do not include a stamp set. They do include the compliments plus two coordinating embellishments. For Regatta, this is a gold and white ribbon and blue puffy stickers.
The paper packs are different too - more printed sheets and only 3 sheets of cardstock (with the kits - no cardstock is included in the paper packs). The kits also have instructions for three double layouts and nine cards, in a printable PDF - no stamping involved on the layouts! You can always add some if you feel like it.
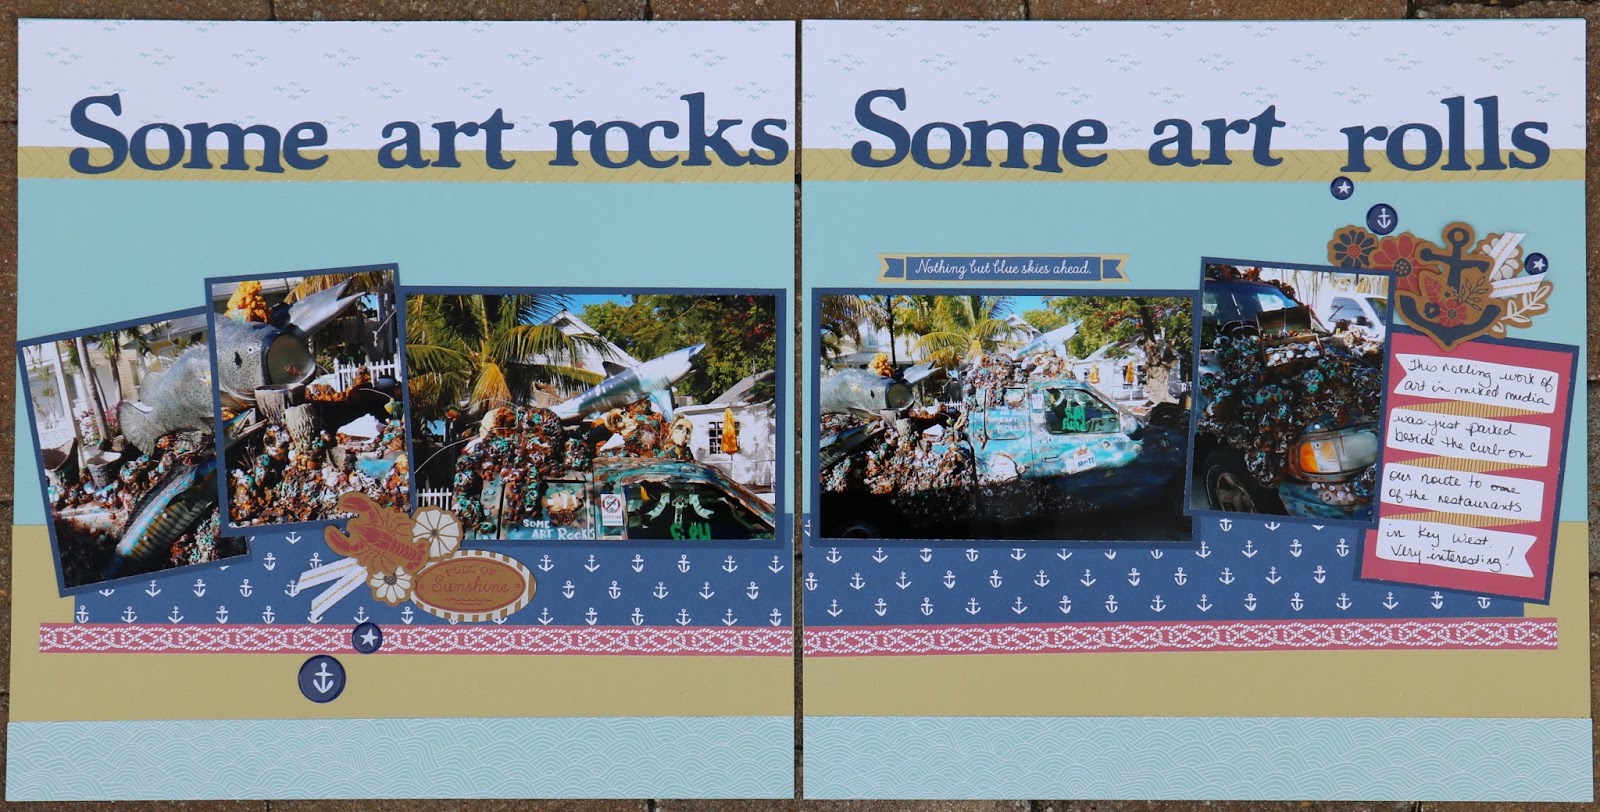
This is my version of the first layout. I moved the photo wells around a little bit, to have a single center for the double layout, instead of two single layouts repeated.
I tacked on the gold and white ribbon with a staple where it was close enough to the edge to do so, and with liquid glass where it was not.
I also ran the flaxen 1/2" strips at the top of the page through the chevron embossing folder before taping it down. My version of the layout uses an additional page of Sapphire cardstock for matting and the title.
My pictures allowed me to cut one in half and use it on the left side of the layout (the big fish), giving me the whole 6X4 picture in two 3X4 wells.
Close to My Heart has revamped their Workshops on the Go - moving to a new format and called Workshops Your Way. These new kits are priced at $27 and do not include a stamp set. They do include the compliments plus two coordinating embellishments. For Regatta, this is a gold and white ribbon and blue puffy stickers.
The paper packs are different too - more printed sheets and only 3 sheets of cardstock (with the kits - no cardstock is included in the paper packs). The kits also have instructions for three double layouts and nine cards, in a printable PDF - no stamping involved on the layouts! You can always add some if you feel like it.
This is my version of the first layout. I moved the photo wells around a little bit, to have a single center for the double layout, instead of two single layouts repeated.
I tacked on the gold and white ribbon with a staple where it was close enough to the edge to do so, and with liquid glass where it was not.
I also ran the flaxen 1/2" strips at the top of the page through the chevron embossing folder before taping it down. My version of the layout uses an additional page of Sapphire cardstock for matting and the title.
My pictures allowed me to cut one in half and use it on the left side of the layout (the big fish), giving me the whole 6X4 picture in two 3X4 wells.
Tuesday, January 5, 2016
Regatta 3X3s
The instructions for the cards in the new Workshop your Way kits call for a 5 1/2" X 4" base. If you take a sheet of 12X12, make your first cut at 8.5". Turn your paper and cut at 5.5" twice. This will leave you two small scraps and then the larger scrap from your first cut. From this larger piece you can cut two 3"X6" card bases, for gifts or small notes. This is what I did with mine.
Zip strips and scraps from Regatta, silver foil
Regatta PML card, white shimmer trim, bitty sparkles
Regatta PML card, January 2016 SOTM
Regatta PML cards, scrap from kit
Monday, January 4, 2016
Regatta Cards
In addition to three double layouts, the new Workshop Your Way kits include instructions for 8 cards - 2 each of 4 designs. You will need the stamp set and thin cuts to complete the cards as they show in the instructions, but all the papers and embellishments are included in the $27 kit.
Sunday, January 3, 2016
The Price is Right Club
The 2016 Price is Right Club will be starting up February 1st. If you love CTMH and don't like to throw parties, this might be for you. It is a commitment club, with rewards.
~You agree up to spend $25 each month, February through November (10 months, $250 total commitment).
~One of these months, you will be the hostess, with $40 worth of select product rewards and one half price item.
~When you are hostess, you still need to make your $25 purchase.
~The $40 worth of free products cannot be applied to your $25 purchase or your half price item.
~You may sign up for as many $25 slots as you like. For each slot, you will be hostess in one month. That's why it's the Price is Right Club - sign up for the price that is right for your needs.
If you are unsure about a long term commitment, but like the idea of free stuff, the host a gathering! These parties are fun, and your rewards are not limited to $40!
~You agree up to spend $25 each month, February through November (10 months, $250 total commitment).
~One of these months, you will be the hostess, with $40 worth of select product rewards and one half price item.
~When you are hostess, you still need to make your $25 purchase.
~The $40 worth of free products cannot be applied to your $25 purchase or your half price item.
~You may sign up for as many $25 slots as you like. For each slot, you will be hostess in one month. That's why it's the Price is Right Club - sign up for the price that is right for your needs.
If you are unsure about a long term commitment, but like the idea of free stuff, the host a gathering! These parties are fun, and your rewards are not limited to $40!
Saturday, January 2, 2016
January Card Class
January card class will be Thursday, January 28, from 5:30-7:30. I'm in need of some birthday cards and so we will be taking advantage of the number one thing I like about Close to My Heart - their kits. We'll be making the three cards from the Kaleidoscope Workshop on the Go Cardmaking Kit. The cost will be $5, and one lucky lady will go home with the stamp set! Please RSVP, max attendance is 9.
Each kit includes the materials (except ink and blocks) to make 5 card for each of the three designs. Can't attend or need more cards? Order your own kit for $24.95!
Friday, December 25, 2015
Wednesday, December 23, 2015
The Hemingway House
I'm stepping away from Christmas with this next layout for a minute. The Georgie pack is designed for baby photos but as there are no babies in my life at the moment, I can definitely use the papers for other thing; they are very neutral prints. Mike's shirt in these photos, from the Hemingway House tour in Key West, just match so well with the Juniper in the Georgie paper pack!
I used the new Artistry Cricut to cut the typewriter and the title. I stapled a double row of the slate twine to the two corners. I added some stamping using a retired stamp set with a script print on it, even though its a little hard to see in these pictures.
Saturday, December 19, 2015
Penguin Tags
And we tune back into Christmas - with a few gift tags using the Season's Greetings stamp set.
From Daisy White cardstock cut 3" tags, Art Philosophy, page 49, Tag, shift,<L>.
From Cranberry cardstock cut 3.25" tags, Art Philosophy, page 60.
(Tip: When using Art Philosophy cartridge, you can use another cartridges overlay to find a key faster by using the alphabet.)
Place the white tag over the red tag and mark the placement of the stars. Cover the marked strip with gold foil.
Stamp the penguin using black pigment ink, clear embossing powder and a heat gun.
Color with Shin-han markers Vivid Green and Carmine.
Stamp the snowflakes in Glacier. You can place all three stamps on one block for faster stamping.
On the back, I used To: and Fr: from the Christmas Post stamp set, and the border from Santa Claus stamp set. The twine is some from my stash.
Merry Christmas!
Wednesday, December 16, 2015
White Pines extra pages
The Holiday Expressions catalog is coming to close! Take a final look and see if there is anything you don't want to miss. This is a layout I did with the White Pines Workshop on the Go, after I completed the two DLO's in the kit. (That's actually chocolate, not black as my mats.) I used the Festive trees hostess stamp set. I cut the shape from the Art Philosophy cartridge, then cut the top off and added it to the bottom for a different look.
So, Christy, what do you think?
Wednesday, October 21, 2015
October Card Class
October card class will be October 29, from 5:30pm until 7:30pm. Cost is $5 or free if you purchase the featured stamp set - Fallen Leaves ($9.95). We'll be making three thank you cards with a fall (gratitude) theme. Here's the first one!
Stamp set:
Stamp set:
Thursday, September 10, 2015
Watering the Paper Garden
September's stamp of the month is Paper Gardens. This stamp set is most certainly worth the full value of $17.95 if you don't need to place an order this month - but it's a steal at $5 with a $50 order. I've used it with the new watercolors in these cards. To make these, I painted the watercolors on the new watercolor paper, then let it dry for 2 days. I used black, new England ivy and sapphire with the stamps, and they all worked just fine. I pressed hard for several seconds before lifting the stamp.
Sailing
Would you guess this was the Nevermore paper pack? I just love the gear paper! I added Lagoon and Pacifica to make it nautical. This page has 12 photos on it, plus a journaling spot. And one of those photos is an 8X8!
Sunday, September 6, 2015
Cave Men
This month's featured kit is Nevermore. It's the Halloween kit, but I have no need of Halloween layouts this year. We are doing Halloween treat bag toppers on the 24th, if you are interested!
But I do love the gear paper in this pack and the steam punk stamp set - Steampunk Scoundrels.
My first layout with the paper pack is of our trip to Cathedral Caverns. The new Saffron colored paper goes so well with the yellow clay photos. This layout is missing my photos, as I don't have them all printed yet. But bats in a cave? How cooler can you get? See the two gears on the far right corner of the right page? That's the Boo stamp, with the B off the edge of the paper. The gears can be found on the Artiste cartridge, pages 38 and 39.
But I do love the gear paper in this pack and the steam punk stamp set - Steampunk Scoundrels.
My first layout with the paper pack is of our trip to Cathedral Caverns. The new Saffron colored paper goes so well with the yellow clay photos. This layout is missing my photos, as I don't have them all printed yet. But bats in a cave? How cooler can you get? See the two gears on the far right corner of the right page? That's the Boo stamp, with the B off the edge of the paper. The gears can be found on the Artiste cartridge, pages 38 and 39.
Thursday, September 3, 2015
Treat bags at the September card class
No cards at the September card class on Thursday the 24th! Come make some Halloween treat toppers instead. $5 for 3 toppers, or free if you purchase one of the two featured stamp sets. Additional toppers can be made and purchased for $1 each. Candy is not included. I will be making the pieces to the toppers during the crop on Saturday the 12th. You are welcome to make toppers during the crop as well - same offer applies!
Featured stamp sets are only $10 each!
Saturday, August 22, 2015
Wild about Legos
Lots of fun stuff in this layout. I used Studio J to get my smaller pictures for the details of the Lego displays at the Huntsville Botanical Gardens. I wanted a reminder of the event, but not necessarily a 4X6 of every one.
Zoe papers and assortment
Love Life stamp set
Spray pen
"Today" is from the stamp sets that come with the Artistry cartridge.
Love Life stamp set
Spray pen
"Today" is from the stamp sets that come with the Artistry cartridge.
Tuesday, August 11, 2015
Studio J
Studio J was my new revelation at convention this year. Close to My Heart kit pages include mats for pictures of unusual sizes - 6X6, 2X3, 1X1. In most of my pictures, my subject takes up the whole 4X6 - it's hard to cut it down to fit these smaller sizes. And I have to remember to get the larger photos printed, once I decide what I want to go on in the mat.
With Studio J, I can open a double layout, add pictures of whatever size I want, keep adding them in any way and have exactly what I need. I just cut them apart when the pages come in.
This particular double layout has photos I need for 6 different double layouts. The cost is $7 for a double layout (plus tax).
Two catches -
1) you have to order a minimum of 4 DLO's. The layouts will be deleted after 90 days of no attention. As long as you keep working on and adding your photos to the pages, all is well. Prints are not available in an hour, and it might take you a while to collect all the photos you need for a minimum order.
2) shipping is $5.95 - from 4 DLO's to 50. So freight is somewhere between $1.50 and $.12 a DLO.
Instead of just printing everything I think I might want to scrap, I can print only what I need. I have boxes (3 full ones, working on box 4) full of photos I've printed and not scrapped. 4X6's that I went back and paid $3 for a 5X7. Extra wallet photos because I only needed a 2X3 but had to pay $2 and get 2 copies to get the size I wanted. I can't say I won't still have a little of this, but the rate at which I fill up my extra boxes should take me a lot longer now.
4X6 can still be printed at your local drug store for cheaper if you are purchasing them in bulk. Another thing to note - Studio J prints are processed - not ink printed on photo paper (like the drugstores).
And that is my favorite thing I learned at convention this year, from my roomie Teresa.
With Studio J, I can open a double layout, add pictures of whatever size I want, keep adding them in any way and have exactly what I need. I just cut them apart when the pages come in.
This particular double layout has photos I need for 6 different double layouts. The cost is $7 for a double layout (plus tax).
Two catches -
1) you have to order a minimum of 4 DLO's. The layouts will be deleted after 90 days of no attention. As long as you keep working on and adding your photos to the pages, all is well. Prints are not available in an hour, and it might take you a while to collect all the photos you need for a minimum order.
2) shipping is $5.95 - from 4 DLO's to 50. So freight is somewhere between $1.50 and $.12 a DLO.
Instead of just printing everything I think I might want to scrap, I can print only what I need. I have boxes (3 full ones, working on box 4) full of photos I've printed and not scrapped. 4X6's that I went back and paid $3 for a 5X7. Extra wallet photos because I only needed a 2X3 but had to pay $2 and get 2 copies to get the size I wanted. I can't say I won't still have a little of this, but the rate at which I fill up my extra boxes should take me a lot longer now.
4X6 can still be printed at your local drug store for cheaper if you are purchasing them in bulk. Another thing to note - Studio J prints are processed - not ink printed on photo paper (like the drugstores).
And that is my favorite thing I learned at convention this year, from my roomie Teresa.
Saturday, August 1, 2015
August Card Class
The August card class is Thursday, August 27th, 5:30pm until 7:30pm. For $5, you'll make these three cards. Card class is free if you decide to purchase the featured stamp set, Someone Special, for $13.95 plus tax and shipping.
Class has 10 spaces, please RSVP!
On white rectangle, stamp base layer of flowers in canary, then top layer in honey or goldrush. Using a mask, stamp leaves in sweet leaf. Then cut white paper into squares 1 1/2" by 1 1/2", green rectangle into squares 1 5/8"X 1 5/8". Mat the white on the sweet leaf squares, then position and tape the matted squares to the hounds tooth paper, popping up one of the squares with foam tape. Dovetail and attach strip on the inside. Adhere to card base, then apply Stickles.
Use scallop punch on the border. Line the bottom of the border up with the long side of the base. Place a row of tape at the top of the border and close the base. This will adhere the border to the front of the card, making both sides the same. Stamp words in Slate, then base blossom in pixie, top layer in sorbet. Using sponges, distress edges with pixie and sorbet. Adhere white layer to sorbet paper, then to base. Apply stickles.
Place butterfly cutout over white rectangle, dot side up. Use a little tape on the edges to keep the mask from shifting. Stamp the little blossom (detail layer) over the mask with glacier ink - covering all the white spaces. Overlapping is fine. Remove mask, and cut out the largest butterfly, rounding edges to give you a full butterfly. Stamp the words in the white spaces. Tape stamped layer to glacier paper to card stock. Adhere butterfly with foam tape. Using liquid glass, put the twine on for antenna. Dovetail and attach strip on the inside.
Sunday, July 19, 2015
July Card Class
These are the three cards we are making in the July card class. They use the Happy Everything Operation Smile stamp set and the Blossom paper pack.
Wednesday, July 15, 2015
Friendship Box
These cute little boxes are from the Artiste cartridge, page 40
5", 3D Object, 0 for the base
5", 3D Object, Shift, 0 (cut 2) for the top and bottom
Tips - crease all folds before taping. Tape the two edges of the top and bottom, then fold around one of the flaps. Tape the base to the middle piece for sturdiness and looks. You can get two boxes from two sheets of paper. Cut the two middle sections from one piece. Cut two of the lids from another sheet, leaving the zip strip on the paper. After cutting the first set of two, remove the paper from the mat, turn so the unused piece is lined up at the top and cut the second two pieces. The cuts will take a small piece of the zip strip, but it will fold in and be unnoticeable in your finished product. Stamp before taping together.
I used the following items on this project.
Treasured Friendship stamp set
Seaside paper pack
Chocolate ink
Desert Sand ink
Foam tape
Teal shimmer trim
Clear sparkles assortment
Surf's up assortment (available only online, in while supplies last)
Vogue alphabet (retiring at the end of August)
5", 3D Object, 0 for the base
5", 3D Object, Shift, 0 (cut 2) for the top and bottom
Tips - crease all folds before taping. Tape the two edges of the top and bottom, then fold around one of the flaps. Tape the base to the middle piece for sturdiness and looks. You can get two boxes from two sheets of paper. Cut the two middle sections from one piece. Cut two of the lids from another sheet, leaving the zip strip on the paper. After cutting the first set of two, remove the paper from the mat, turn so the unused piece is lined up at the top and cut the second two pieces. The cuts will take a small piece of the zip strip, but it will fold in and be unnoticeable in your finished product. Stamp before taping together.
I used the following items on this project.
Treasured Friendship stamp set
Seaside paper pack
Chocolate ink
Desert Sand ink
Foam tape
Teal shimmer trim
Clear sparkles assortment
Surf's up assortment (available only online, in while supplies last)
Vogue alphabet (retiring at the end of August)
Friday, July 3, 2015
Jet Set
The month of July is traditionally my month to try and use up some of the papers I've been saving/collecting since the last CTMH catalog came out last August. This paper pack I've pulled from my stash is the last of the Tommy kit - which is more than a year old. I scrap lifted the idea from a site on Pintrest. The background is from another long retired set, Dakota.
The black net in the background is a found object - from ham in the freezer, if you can believe it, attached with mini staples. The sequins are from the Oceanside pack, old hemp in the string of flags, some star and anchor charms, and the last of the Tommy assortment pack.
This is busy, artsy page but I had a lot of fun putting it together.
The black net in the background is a found object - from ham in the freezer, if you can believe it, attached with mini staples. The sequins are from the Oceanside pack, old hemp in the string of flags, some star and anchor charms, and the last of the Tommy assortment pack.
This is busy, artsy page but I had a lot of fun putting it together.
Subscribe to:
Posts (Atom)