Saturday, August 22, 2015

Wild about Legos

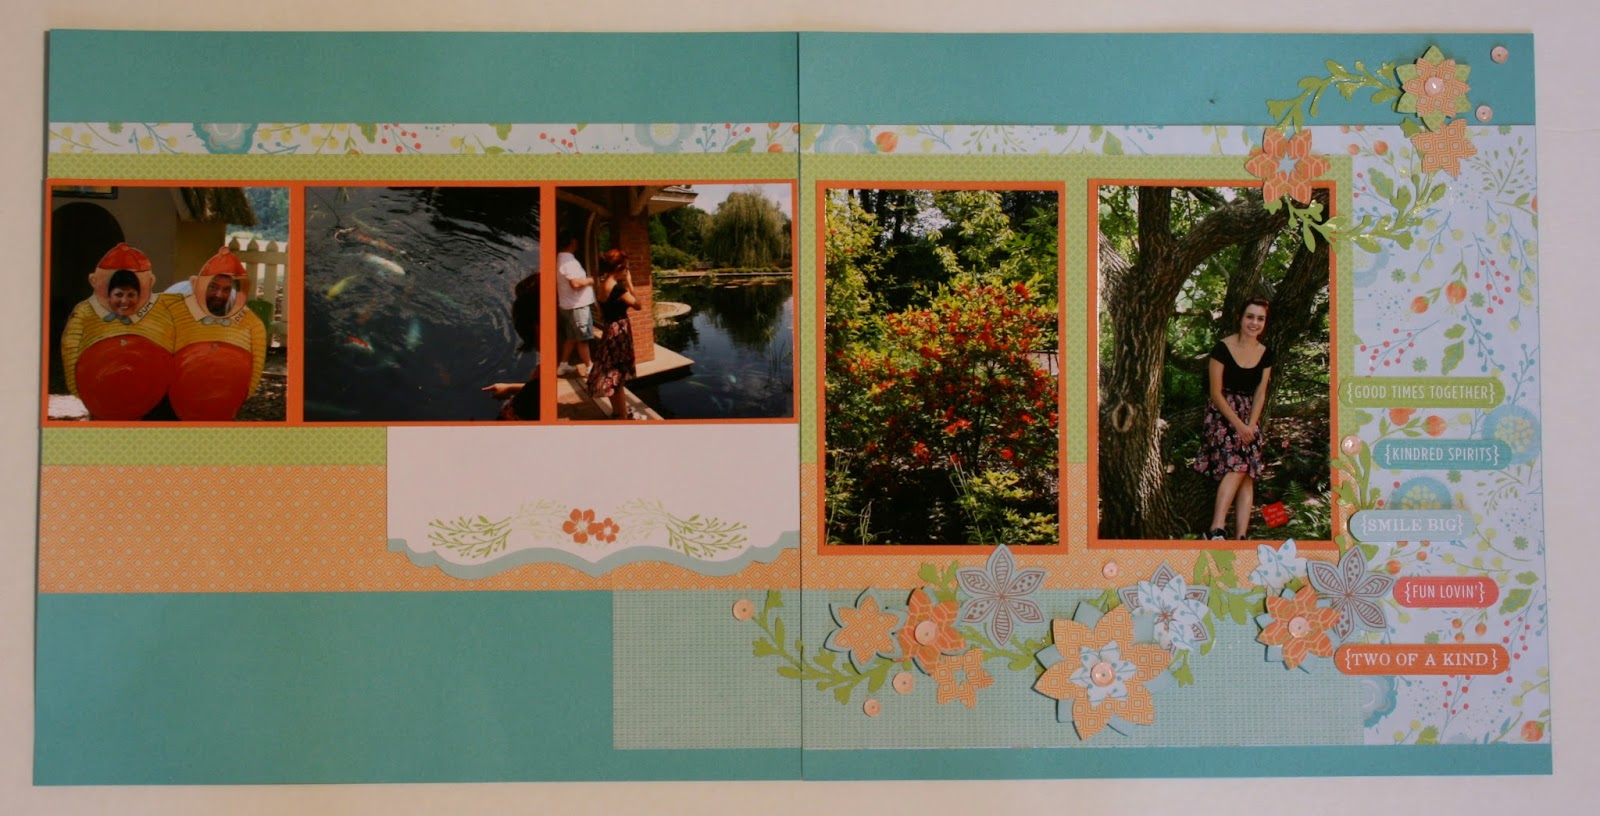
Lots of fun stuff in this layout.  I used Studio J to get my smaller pictures for the details of the Lego displays at the Huntsville Botanical Gardens.  I wanted a reminder of the event, but not necessarily a 4X6 of every one.
 
 
Zoe papers and assortment
Love Life stamp set
Spray pen

"Today" is from the stamp sets that come with the Artistry cartridge.

Tuesday, August 11, 2015

Studio J

Studio J was my new revelation at convention this year.  Close to My Heart kit pages include mats for pictures of unusual sizes - 6X6, 2X3, 1X1.  In most of my pictures, my subject takes up the whole 4X6 - it's hard to cut it down to fit these smaller sizes.  And I have to remember to get the larger photos printed, once I decide what I want to go on in the mat.

With Studio J, I can open a double layout, add pictures of whatever size I want, keep adding them in any way and have exactly what I need.  I just cut them apart when the pages come in.

This particular double layout has photos I need for 6 different double layouts.  The cost is $7 for a double layout (plus tax). 
Two catches -
1) you have to order a minimum of 4 DLO's. The layouts will be deleted after 90 days of no attention.  As long as you keep working on and adding your photos to the pages, all is well.  Prints are not available in an hour, and it might take you a while to collect all the photos you need for a minimum order.
2) shipping is $5.95 - from 4 DLO's to 50.  So freight is somewhere between $1.50 and $.12 a DLO.

Instead of just printing everything I think I might want to scrap, I can print only what I need. I have boxes (3 full ones, working on box 4) full of photos I've printed and not scrapped.  4X6's that I went back and paid $3 for a 5X7.  Extra wallet photos because I only needed a 2X3 but had to pay $2 and get 2 copies to get the size I wanted.  I can't say I won't still have a little of this, but the rate at which I fill up my extra boxes should take me a lot longer now.

4X6 can still be printed at your local drug store for cheaper if  you are purchasing them in bulk.  Another thing to note - Studio J prints are processed - not ink printed on photo paper (like the drugstores).

And that is my favorite thing I learned at convention this year, from my roomie Teresa.

Saturday, August 1, 2015

August Card Class

The August card class is Thursday, August 27th, 5:30pm until 7:30pm.  For $5, you'll make these three cards.  Card class is free if you decide to purchase the featured stamp set, Someone Special, for $13.95 plus tax and shipping.
Class has 10 spaces, please RSVP!
On white rectangle, stamp base layer of flowers in canary, then top layer in honey or goldrush.  Using a mask, stamp leaves in sweet leaf.  Then cut white paper into squares 1 1/2" by 1 1/2",  green rectangle into squares 1 5/8"X 1 5/8".  Mat the white on the sweet leaf squares, then position and tape the matted squares to the hounds tooth paper, popping up one of the squares with foam tape. Dovetail and attach strip on the inside. Adhere to card base, then apply Stickles.

Use scallop punch on the border. Line the bottom of the border up with the long side of the base.  Place a row of tape at the top of the border and close the base.  This will adhere the border to the front of the card, making both sides the same.  Stamp words in Slate, then base blossom in pixie, top layer in sorbet.  Using sponges, distress edges with pixie and sorbet.  Adhere white layer to sorbet paper, then to base.  Apply stickles.

Place butterfly cutout over white rectangle, dot side up.  Use a little tape on the edges to keep the mask from shifting.  Stamp the little blossom (detail layer) over the mask with glacier ink - covering all the white spaces.  Overlapping is fine.  Remove mask, and cut out the largest butterfly, rounding edges to give you a full butterfly.  Stamp the words in the white spaces. Tape stamped layer to glacier paper to card stock. Adhere butterfly with foam tape.  Using liquid glass, put the twine on for antenna.  Dovetail and attach strip on the inside.

Sunday, July 19, 2015

July Card Class

These are the three cards we are making in the July card class.  They use the Happy Everything Operation Smile stamp set and the Blossom paper pack.


Wednesday, July 15, 2015

Friendship Box

These cute little boxes are from the Artiste cartridge, page 40
     5", 3D Object, 0 for the base
     5", 3D Object, Shift, 0 (cut 2) for the top and bottom


Tips - crease all folds before taping.  Tape the two edges of the top and bottom, then fold around one of the flaps.  Tape the base to the middle piece for sturdiness and looks.  You can get two boxes from two sheets of paper.  Cut the two middle sections from one piece.  Cut two of the lids from another sheet, leaving the zip strip on the paper.  After cutting the first set of two, remove the paper from the mat, turn so the unused piece is lined up at the top and cut the second two pieces.  The cuts will take a small piece of the zip strip, but it will fold in and be unnoticeable in your finished product. Stamp before taping together.


I used the following items on this project. 

Treasured Friendship stamp set
Seaside paper pack
Chocolate ink
Desert Sand ink
Foam tape
Teal shimmer trim
Clear sparkles assortment
Surf's up assortment (available only online, in while supplies last)
Vogue alphabet (retiring at the end of August)

Friday, July 3, 2015

Jet Set

The month of July is traditionally my month to try and use up some of the papers I've been saving/collecting since the last CTMH catalog came out last August.  This paper pack I've pulled from my stash is the last of  the Tommy kit - which is more than a year old.  I scrap lifted the idea from a site on Pintrest.  The background is from another long retired set, Dakota.
The black net in the background is a found object - from ham in the freezer, if you can believe it, attached with mini staples. The sequins are from the Oceanside pack, old hemp in the string of flags, some star and anchor charms, and the last of the Tommy assortment pack.
This is busy, artsy page but I had a lot of fun putting it together.

Wednesday, June 24, 2015

I Scream, You Scream

We all scream for ice cream!  I had a great occasion to use the June stamp of the month on a scrapbooking layout.  This was not a fast page, as I leisurely stamped and cut out my ice cream cones and popsicles, stamped cut and paper pieced the ice cream truck.  But I love the way my page turned out. I used the May special paper pack - with all those fruits - but I used the plain sides of the paper.  On the lemon yellow papers, instead of cutting off the zip strip, I cut 1/2 inch from the bottom and flipped the page - to keep the border at the bottom.  There's a little shin-han marker on the 'glass' of the ice cream truck, as well as black button tires.


 The little puppy would be cute on birthday cards or invitations.
What about a page of those crying/screaming baby pictures with the title - I scream,(at the top), and but still sweet (at the bottom)?

Monday, June 22, 2015

June Card Class

June card class is this Thursday.  I have 6 slots still open!  3 cards for $3, 5:30-7:30pm, June 25th.  RSVP is appreciated!


Wednesday, May 6, 2015

Blossom Kit for Sale

The Blossom paper pack has a coordinating card kit, but not a scrapbooking kit.  I have several of these Blossom kits, cut out (stamped if requested) and ready to assemble for sale, $10.00 each. This includes a photo to help you assemble the kit and a full pack of Coral sequins.  Contact me if you are interested.  If you have already purchased, or would like to purchase the Blossom paper pack from me, I will be happy to give you the cutting instructions at no charge!

Sunday, April 19, 2015

April Card Class

Card class will the Thursday, April 23, 5:30 - 7:30 pm.  We'll be making a single card this time for $3.  Please RSVP by Wednesday if you are able to attend, so I can have enough pieces cut.   For those unable to attend, a short tutorial follows.


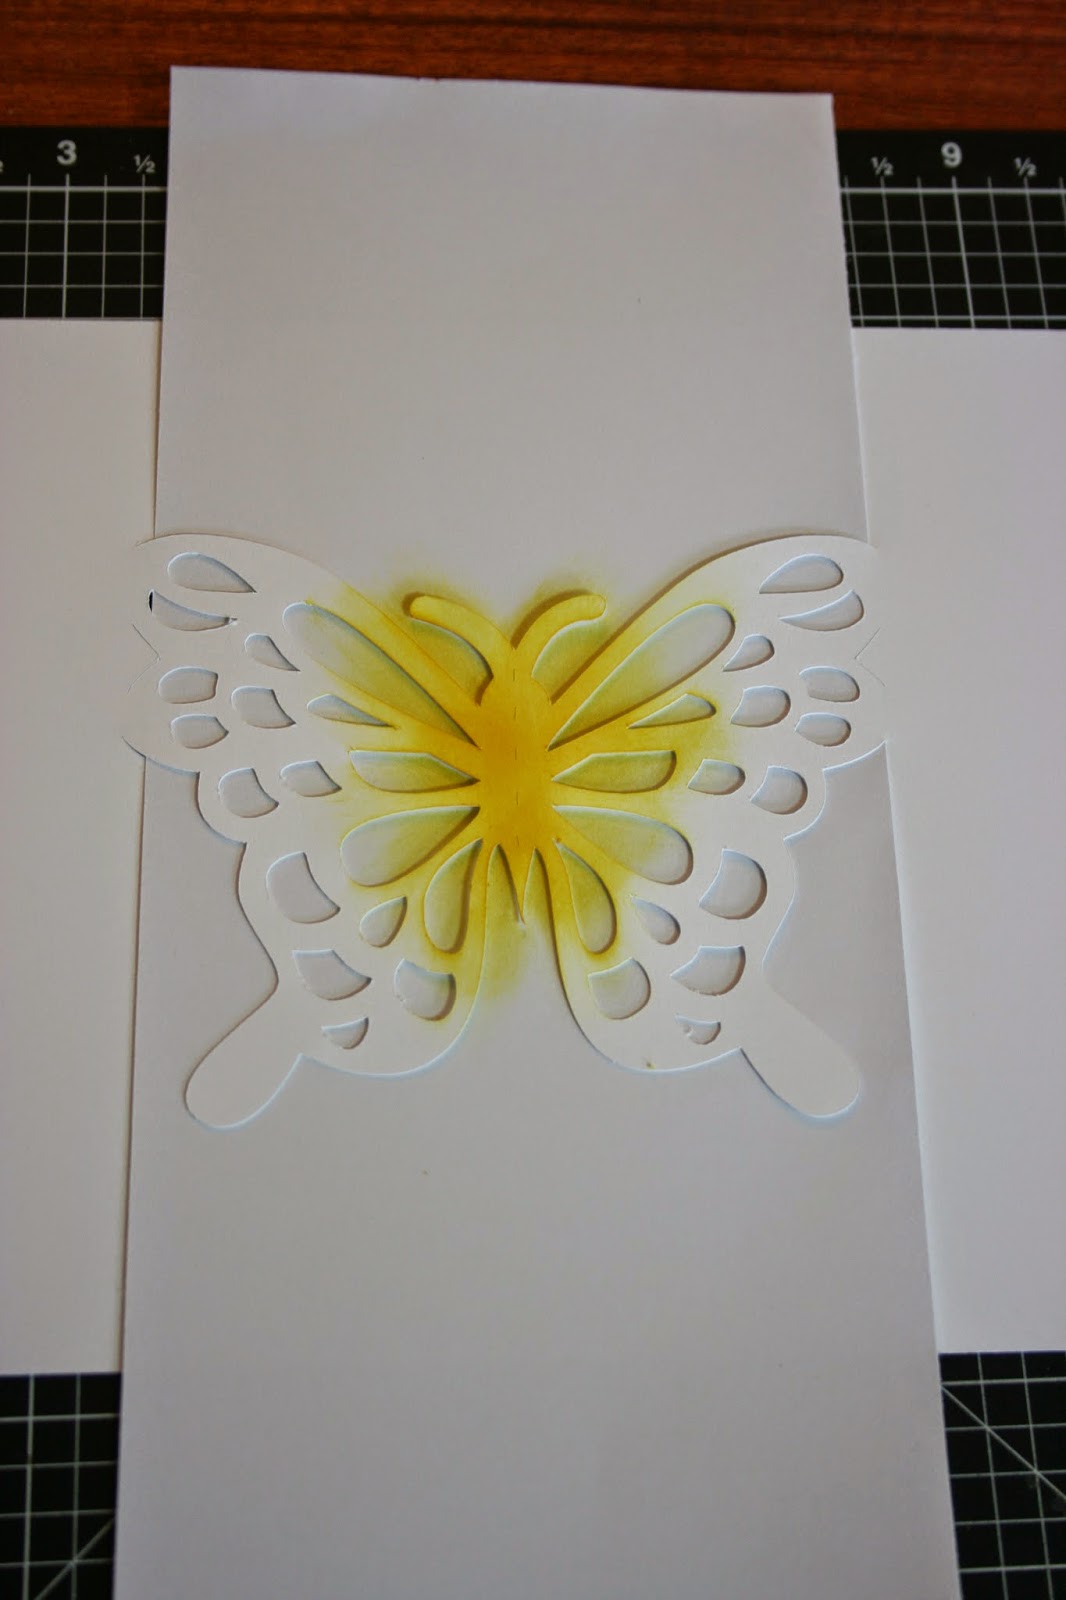
Cut from white cardstock - 7", Pop-up, shift, R.  Slide a scrap piece of paper underneath the butterfly - 12"X4.5"   Using sponge daubers, color in the center of the butterfly with Canary yellow.

Mask off the outer edges of the butterfly with washi tape, and color in the rest of the butterfly. 
This gave me straight edges for the butterfly wings, so I removed the tape and carefully dabbed a little more color on the tips of the wings, to round them out.  Left side shows where I added some ink, right side shows the flat edges.
Using the stamp set Your Own Kind of Wonderful, I added more butterflies to the left, using the rock and roll method, overlays as designed by the stamp set and straight stamping.  The words on the inside are from the hostess rewards set Better with a Friend (hostess stamp page 9 of the main catalog).  I also sponged around the outside edges in both pixie and canary.
For the outside of the card, cut using 7", Pop-up, r from the Artfully Sent Cartridge.  The panel for words is from the Art Philosophy Cartridge, 2.5" page 55, and 2.75", decorative layer, shift, page 55.  Tip: if you throw another overlay on the machine, page 55 is the B button.
Stamps are from Mother's Day (retired) and Brushstrokes.  I added a few butterflies in silver glitter paper, but the print is so busy you don't need much on the front.
Finish it off with a lined card from Artfully Sent.  I used 5", page 45, shift (liner) and no shift (envelope).
If you do not need a Mother's day card, you can change the wording to make it a birthday card at the class.

Monday, April 6, 2015

A Very Merry Un-birthday to You!

Have as much fun with your birthday hat as you like!  Mine is super simple - cut from the Artiste cartridge, with some glitter paper behind the stars and some old ribbons from the top!  Show me yours on Saturday!  In this contest - everyone sporting their hat wins! 

Around the bottom I wrote "A very merry unbirthday to you!"

Saturday, April 4, 2015

April Crop

The April Crop is on the 11th, from 9am until 9pm.  The featured paper pack is Confetti, and the theme is Happy Birthday! 

Capturing an idea from a fellow scrapper (click to see her blog and samples), I'm offering a free goodie to any attending that creates and wears their own party hat!

Come join the fun!

Sunday, March 1, 2015

Steampunk background

Stamping your own back ground is nothing new, but here's a steam punk version I love.  It's the stamps from the hostess stamp set A thing well done, in desert sand on kraft paper.
 
I  used a strip on this journal.


Wednesday, February 18, 2015

March's card class

At the card class on March 26,  I'll be doing a tutorial on how to make a pop up card like the one below.  Because what I'm showcasing is more a technique and not a particular product, each card will be different, and from retired stock.


The card folds flat to fit in a standard card envelope.

Sunday, February 15, 2015

Make it match Ribbon

Quick tip - I wanted to use a little Slate Diagonal Striped ribbon on my project, but the white was too pronounced.  So I drug the ribbon across my Glacier ink pad, pressing down with a sponge dauber, pulling it quickly.  It toned down the white and matched my paper.

 
My finished project is a match box holding 16 change of address cards.

 
Items used:
Artiste cartridge
Seaside paper pack
White cardstock (inside box)
Treasured Friendship
Slate Diagonal Striped Ribbon
Seaside PML card
Journey Base & Bling charm
Blending Pen (pink inside the conch shell)
Retired slate washi tape
Retired Glitz
 

Thursday, February 12, 2015

Brushed Butterflies

The featured kit for the March Crop is Brushed.  These colors are bright and beautiful.  This uses the Brushed paper pack, the stamp set Your Own Kind of Wonderful, Card Chatter-Birthday (retired) and most of the colors in the Brushed palette. 


Monday, February 2, 2015

Embossing Gold

If you ordered the Year>>>Noted special in January, you received a sheet of gold foil stickers.  Flat gold foil stickers.
 
With the help of an embossing folder
You can add some texture to the flat gold foil!
 
In this sample I used the gold foil, paper from the Year>>>Noted pack and the February Stamp of the Month.  I love the wispy look of the branches, done here in juniper, both first and second generations.
 
I'm a little late with the embossed foil idea for anyone who didn't order the special in January.  I did end up with an extra in my inventory if you are interested.   However, the February stamp of the month is right on time, available all of February, just $5 with a $50 order!


Saturday, January 31, 2015

February's Sweet Album Special

During the month of February, if you order a Close To My Heart new canvas album, you can get a second one at half price - a $17 savings!  I have several reasons to think this is a great deal!

First they have two great new colors, plus black.

2. - They come in D Ring binder style or Post bound.

3. - The post bound albums are the easiest to assemble that I've ever tried.

When ordering a post bound album, I recommend also getting 2 packages of Z1984 - 25 Top Load Value Pack and 1 set of Spine Expanders for a 50 page/100 layout album.  It will take one time to assemble your book and be done in a snap.  I'll even do the assembly for you, if you order the set through me.

The books we buy from Michaels and Hobby Lobby have little posts, that like to spin when you try to take them apart.  You need to purchase more post connections and more pages, to make your book the right size and you have to pay close attention to make sure you pick up the additions that will match your book.  Check out this post system Close to My Heart has to offer....


It's a single one and a half inch post!
 
With a handle for better torque when putting it together!
 
With the spine expanders, it helps keep your books from looking like this:
So even if you still use another brand of album, the spine expanders - at $2.95 - are a great bargain. They are heavy duty plastic - not just cardboard pieces.
 
My new Ruby album looks like this:
as it waits on completed layouts.  Also, Close To My Heart page protectors are a heavier quality than you find in most albums. 
 
I'm working on my Vegas Album and even with most of the pages in the book, I still have growing room without it looking like an alligator.
And another super cool feature... Personalization!  You will have to do the personalization yourself or find someone who does vinyl.  For those of you who are local, Amy Sharpe did this for me for $15.  Simple wording is only $5.
 
How would your albums look with the year or a name on the front?  Amy and I did find the vinyl would not adhere to the spine, only the padded front cover.
 
 
Don't let this sweet February special pass you by!