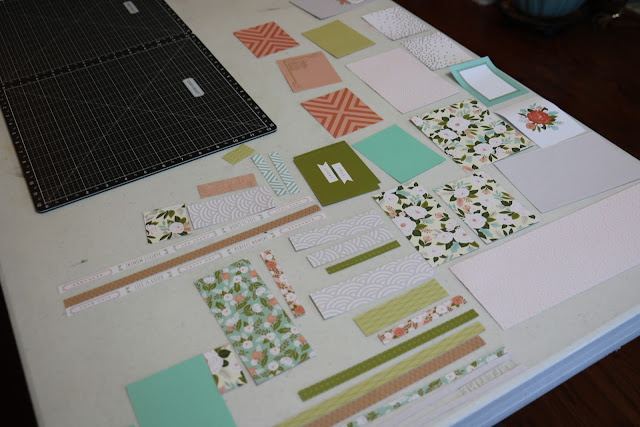
Well, it's the end of the month, and time for the end of a kit. It's a real shame when we look at our stash and just say "I have so much STUFF". I don't think we could do without it; you need a certain supply level in order to have what you need, when you need it. But I also know that I am not going to mix and match my wonderful CTMH kits. So when I complete projects with all the leftover pieces of a kit, that's one less stack of supplies, and puts me closer to completed projects. I have two D ring binders of completed pages, waiting on the perfect pictures to show up. This process works for me, and when those pictures are printed, making it a completed work of art is a snap.
This is what I was left with of the Hello Lovely Workshop Your Way, after I finished the layouts and cards shown in the instruction set. It's not a lot, no full pages and lots of PML cards.
I am also a big advocate of using what you have. We buy all these great stamps, then use them for the advertised sampled, but what then? They shouldn't just sit in the box! As a consultant, sometimes I worry that it's unfair of me to post a sample with a product you can no longer buy. I hope that if you love something, you buy it and add it to your stock. CTMH's marketing philosophy is to give you more options, and updates frequently. You have 4 months to get what you like, then they give you new options. If I use something retired, like this swan stamp, that you don't have, you can probably find another stamp set you love in your stash to pull out and use instead.
So back to what I did with the scraps from the Hello Lovely kit. I loved the two tone Sorbet PML cards, but the colors just didn't go with my pages, in my color challenged mind. But they made two of this great card. The sentiment is from one of the stamp sets that come with the Flower Market Cricut cartridge. Building from the bottom, that's a PML card, stamped the cattails, zip strip, swan, sentiment. And when you have scraps of zip strips, you can add one to the bottom of the interior of the card for an extra touch. The swans were stamped first and second generation in Sorbet.

Next is another PML card. These said Best Day, in between the flowers. I simply cut the Best Day out, trimmed the PML to fit my card and stamped a sentiment in the middle. Then I took the clear shimmer brush and added sparkle to the flowers.
Next card - more PMLs! This one took a little more time. The green background is a PML card with more words I didn't want on there. I matted it with Glacier paper, then covered the words with scrap strips and a leftover piece of zip strip The flowers are from another PML card, where I fussy cut the bouquet. There is a small strip of glitter paper in there, and again, I shined up the flowers with the clear shimmer pen.
Now cards aren't the only thing you can get from scraps. I usually start with laying all the stuff out on the table (like the first picture), then seeing what I can make pages with. Anything I can't gets moved into a card. I really liked the way this layout turned out. You have to add cardstock when you do the pages, for this one it was two daisy white and one champagne. This layout is simple - two zip strips across the top, a row of PML cards and scraps, another line of zip strips and a row of the blush shimmer ribbon. Before placing all that down, I kept with the art deco style and stamped some loops on the bottom in Champagne (another retired and favorite stamp set). The words are from the Hello Lovely scrapbooking stamp set, in Desert Sand. The mats are in Champagne; one 5X7, two 4X6 and 3 3X3. Oh, and a few of the new gold gems. So, this makes layout number #4 from the kit.
And here is layout #5! Just simple 2X2 squares along the top, a 1/4" strip of sea glass glitter paper below that, then space for 6 4X6 vertical photos across the DLO, then another strip of sea glass glitter paper. The title will go at the bottom of the page, once the right pictures come along. The embellishments at the top are from a cricut cartridge - background in sea glass, top in white, then covered with clear Glitz. Yep, I still have some of that in my supply stash. You could also cut the top layer from white glitter paper for the same effect.
And that concludes this episode of Hello Lovely! Tune in again, as we start Dreamin' Big!


Such great use of your scraps...thanks so much for the reminder to use it all up!
ReplyDelete