


Cut a strip of paper 4" x 11 3/4"
Score at 3 3/4", 4", 7 3/4" and 8" (four score lines)
Angle the paper on your trimmer so the 8" score line is on the 1/4" line at the top, and on the 1" line at the bottom corner. (I've drawn lines on this sample so you can see better.) Then slice!


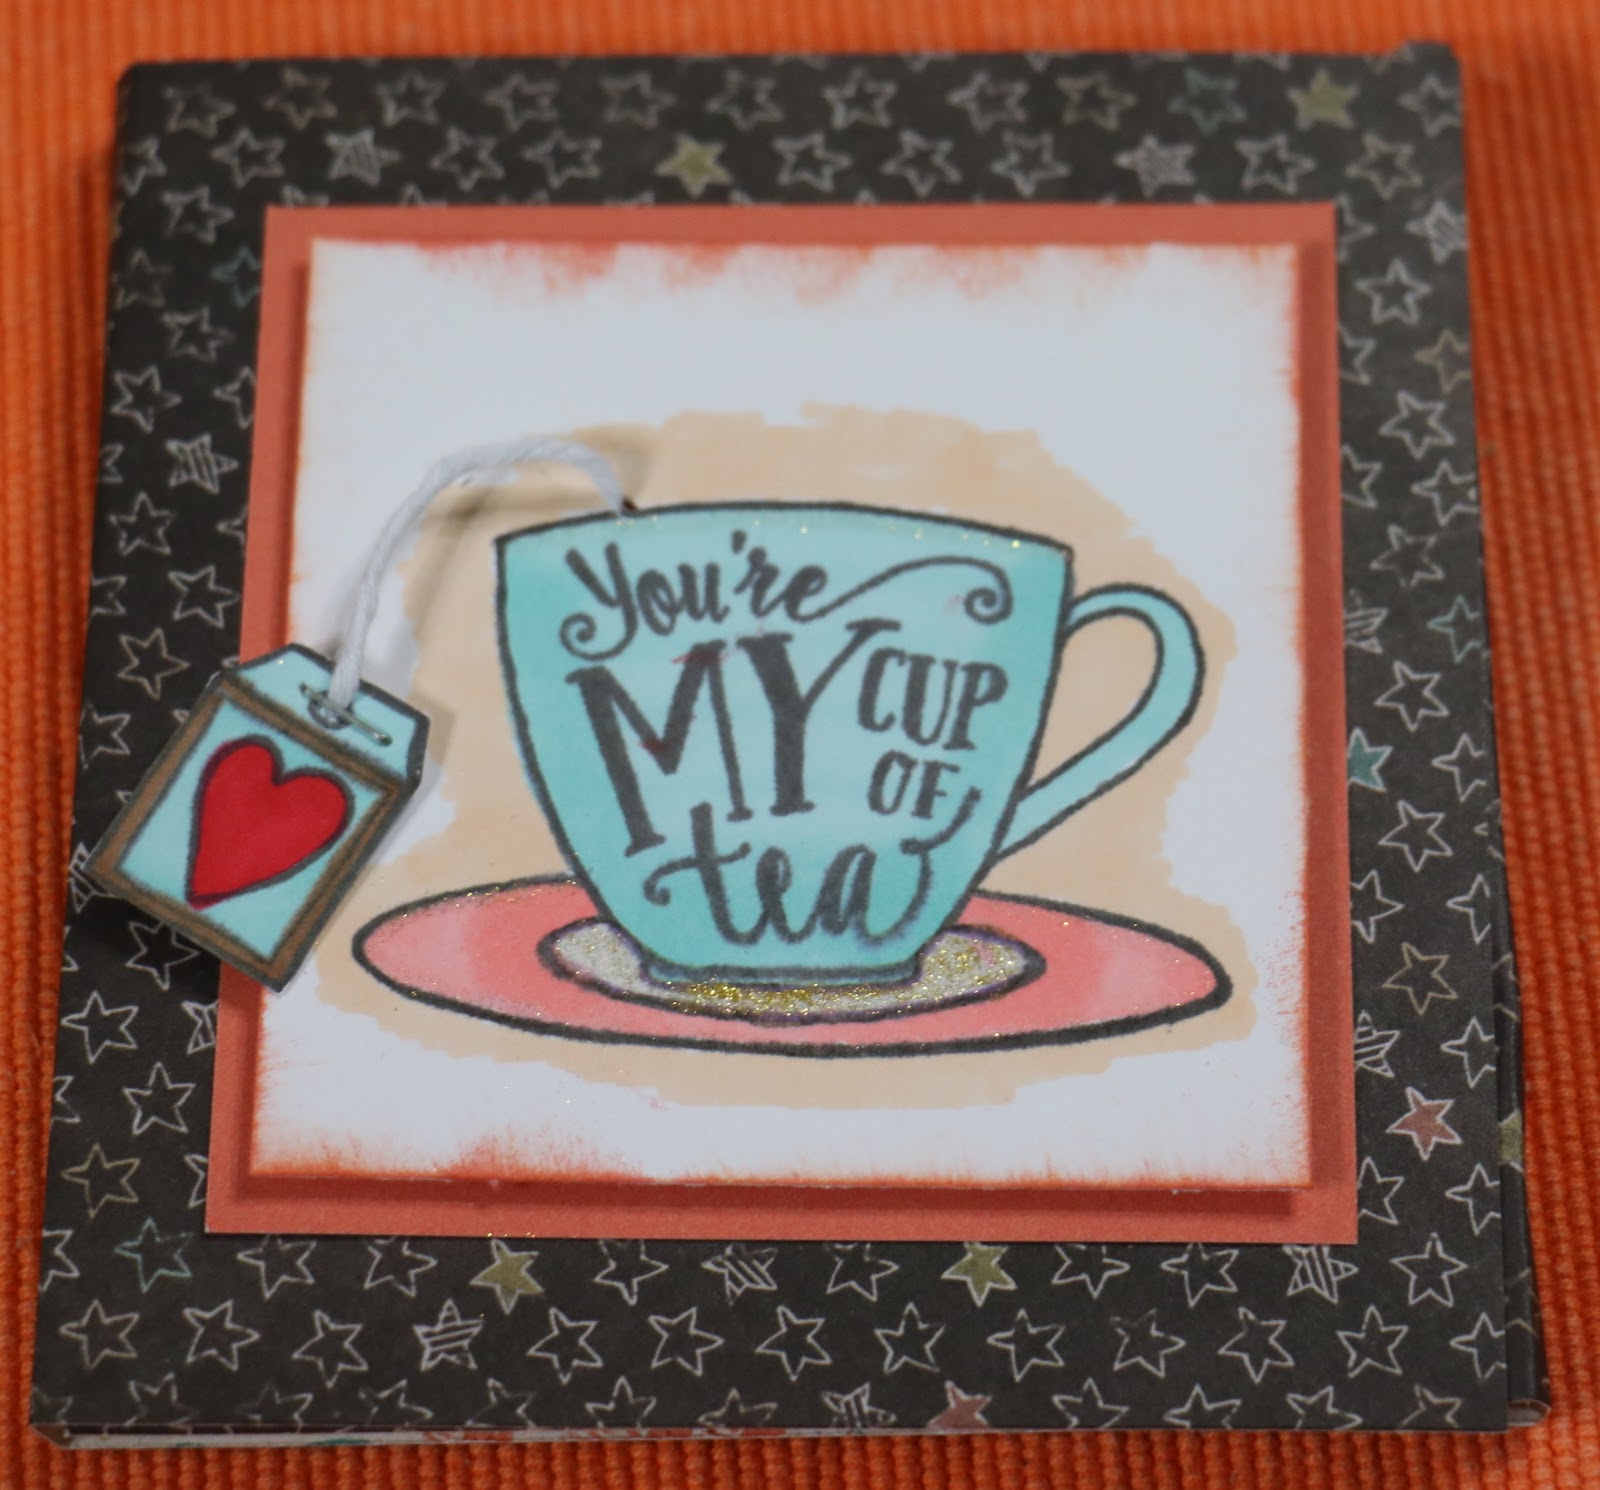
Using thick narrow foam tape on the short edge and along the bottom, make a pocket for your tea bag. Add a second little piece for the words - start with a 3" square, cut at 3/4" angled to the 2 3/4" level on the far side. I find this easiest to mark those two measures, then slice the distance between.
Decorate the top as desired. I used Shin-han markers to color my tea cup and make a shadow around the cup. I poked a hole near the top of the tea cup, then pushed white twine through the hole with the paper piercer. I did the same thing with the tag, holding both in place, in the back, with a little scotch tape. I then added a staple to the tea bag - not only do real tea bags come with a staple, for some reason this kept my tag right side forward! It is loose, and will move as you move the card. If you tag doesn't want to stay right side forward, a little foam tape will help it out. I added a golden touch with the new gold shimmer brush on the plate and the top of edge of the cup,
I was able to find the papers I needed in my scrap basket. I'm always looking for ways to make that pile smaller!
This stamp set is only available through the end of March. $17.95 or $5 with a $50 order!

So super cute. I am defiantly going to make this card when I get my sotm :)
ReplyDelete